
5 Best VPNs for Movies in 2026: Stream From Anywhere

VPNs are the most convenient tool for securing your online streaming activities. However, finding one that can keep your data safe without causing buffering during your home movie marathons is challenging.
With this in mind, my team and I tested 50+ VPNs. I found the best ones for high-quality streaming on the most popular movie platforms. These VPNs have fast speeds and many global server locations, so it's possible to stream movies from anywhere in UHD. Continue reading to compare these VPNs' benefits and drawbacks to decide which one suits your streaming activities and preferred devices best.
How We Chose the Best VPNs for Streaming Movies
Here are the main factors I considered when ranking the best movie VPNs. If you wish to run your own tests, feel free to use this list as a guideline:
- Works with popular movie sites. A VPN should work with the streaming platforms you frequently watch. All the listed VPNs worked with the most popular streaming services, including Netflix, Max, Hulu, BBC iPlayer, and Prime Video.
- Server network. Choose a VPN with reliable servers worldwide to watch movies securely from anywhere. Several are better to avoid slowdowns due to overcrowding.
- Impressive speeds. Watch movies online in full HD or 4K by selecting a VPN that keeps speed drops to less than 20% and doesn’t cap bandwidth. This enables smooth playback and even fast downloads for offline viewing.
- Easy to use. Look for a VPN for movies with user-friendly apps for quick start-up and support multiple connections to safeguard all devices that support streaming.
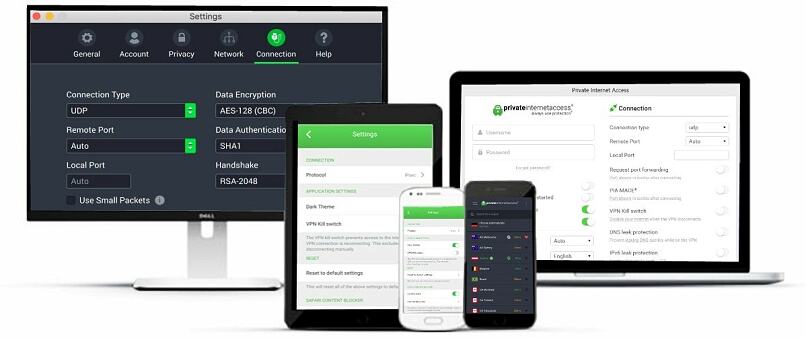
- Robust security. To stream safely while keeping your online activity and identity private, look for a VPN with high-level encryption, IP/DNS leak protection, a kill switch, and a no-logs policy. All my listed VPNs have these features and more.
- Excellent customer care. Responsive customer support is crucial in resolving issues quickly. So, ensure the VPN offers reliable options like live chat, email, and social media for prompt assistance whenever you need it.
- Trusted money-back guarantee. Choose a VPN that gives you a chance to test its movie-watching capabilities and get a refund if you’re not happy.
Recommended VPNs for Streaming Movies — Quick Reveiws (2026)
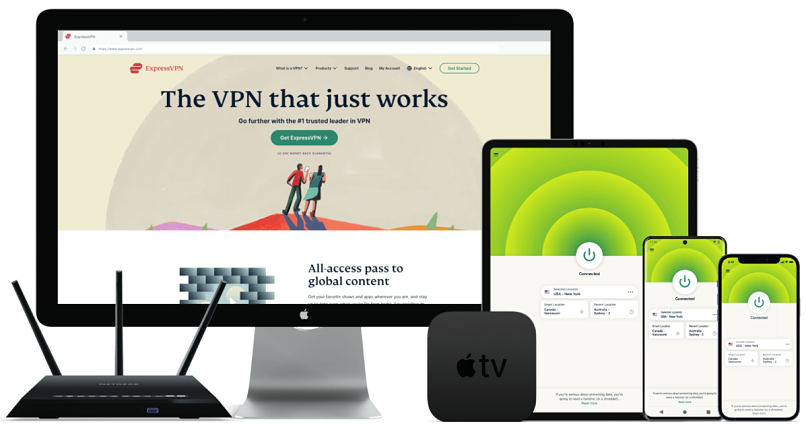
1. ExpressVPN — Impressive Speeds To Watch Movies Without Buffering From Anywhere
Tested May 2026
| Best Feature | Maintains high-speed connections on all the popular movie platforms tested |
|---|---|
| Speed | Only a 5% speed drop testing servers, excellent for uninterrupted streaming |
| Server Network | 3,000 servers in 105 countries to avoid delays due to overcrowding |
| Compatible With | Windows, Mac, Android, iOS, Linux, smart TVs, Fire TV Stick, routers, Kodi, and more |
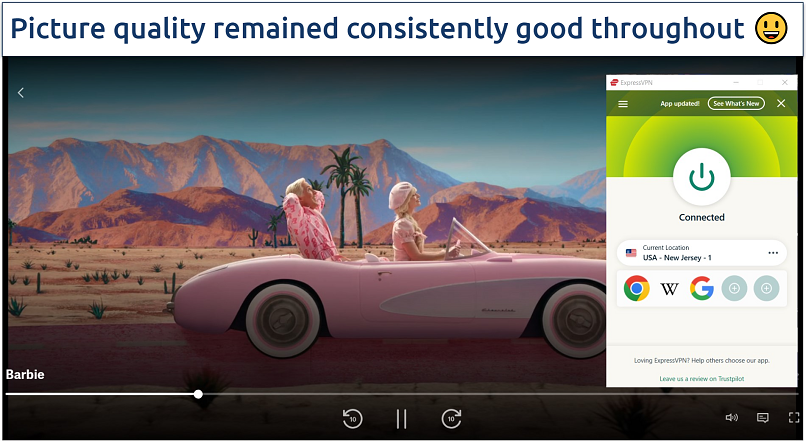
ExpressVPN is the fastest VPN I tested for securely watching movies online in full HD and 4K. I experienced no buffering while streaming movies on Hulu, Max, Netflix US, and Amazon Prime Video. Testing a New York server dropped my average download speed from 126.29Mbps to 118.8Mbps. This barely noticeable change didn't affect my video quality at all. The VPN's stellar performance is due to its proprietary Lightway protocol, which uses minimal code to move your data faster. Also great for streaming on mobile since it drains less battery.
 ExpressVPN's Smart Location feature automatically connects you to a fast (nearby server)
Its global network makes it easy to find a reliable server near you for streaming movies. This extensive coverage can also help you avoid overcrowding-related slowdowns. It also means that ExpressVPN is able to access various streaming platforms, like Disney+ and Peacock, in HD from anywhere. You can also use it to stream niche channels like Freevee, Starz, and Hallmark without worrying about snoops and hackers.
Watching movies online securely is straightforward with ExpressVPN's intuitive and similar-looking apps. If you have an Android or Apple TV, simply download and install the app from the relevant store — I was streaming Barbie on my Samsung TV in under 5 minutes. It also lets you save shortcuts to your movie platforms in the app’s interface. This lets you establish a connection and open the streaming app or site within seconds.
Unlimited bandwidth and P2P-friendly servers for fast copyright-free movie downloads further support this VPN as a great choice for any film enthusiast. There’s also a 30-day money-back guarantee*, and it’s easy to claim a refund via 24/7 live chat.
Useful Features
- MediaStreamer. This feature lets you use ExpressVPN to watch movies on devices that don’t usually support VPNs, like older smart TVs and game consoles. However, it's exclusively functional in the US and UK and doesn't encrypt your traffic. If you're in another country, use ExpressVPN's customer router app to stream on any device connected to your home network.
- Regularly updated IPs. Some movie services block VPNs' IP addresses, even though you're in a country where the content is legally available. ExpressVPN frequently refreshes its IPs and automatically conceals your VPN usage to avoid detection and blocking.
- Split tunneling. This feature lets you choose which apps and websites get routed through the VPN. I use it to direct streaming traffic exclusively via ExpressVPN. This gets me better speeds, as only the movie traffic gets encrypted.
- Ad and tracker blocker. Activating ExpressVPN's Threat Manager and ad blocker features provides extra protection against snoops and hackers if you accidentally open malicious movie sites.
- One of the fastest VPNs
- Works with top streaming sites
- A proven no-logs policy
- Limited customization
- Smart Location isn't always the fastest
2. CyberGhost — Specialty Servers to Conveniently Stream Movies in Seconds

| Best Feature | Securely watch movies from anywhere in just 2 clicks |
|---|---|
| Speed | A 7% average reduction in speed testing servers |
| Server Network | 11,690 servers in 100 countries, plus specialty ones for torrenting |
| Compatible With | Windows, Mac, Android, iOS, Linux, smart TVs, Fire TV Stick, routers, Kodi, and more |
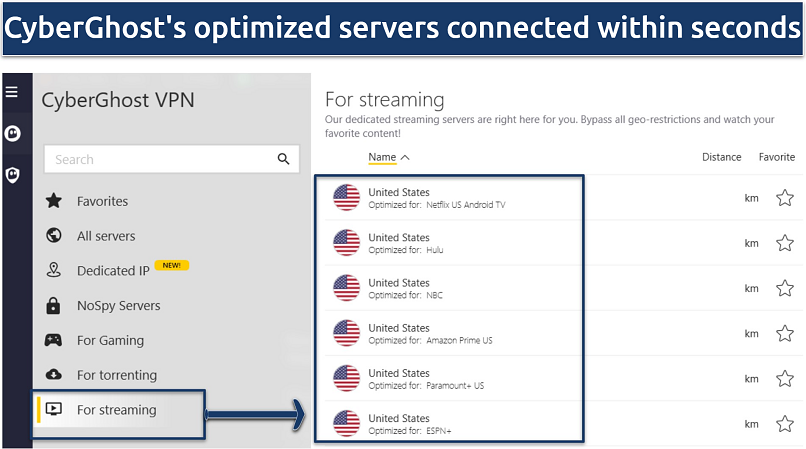
CyberGhost has 100+ dedicated servers for reliably streaming popular platforms from anywhere, including Netflix, BBC iPlayer, Amazon Prime Video, DAZN, and more. While testing CyberGhost’s Hulu-streaming server, I had no problem accessing my Hulu with Max account and watching The Last Of Us. I had the same easy experience streaming Judy Justice on my Amazon Prime Video account with the CyberGhost server optimized for the platform.
Its user-friendly apps make it easy to navigate features and establish a secure connection. I saved my favorite servers (click the star icon) for streaming movie sites into a dropdown menu for quick connections. You can find the streaming-optimized servers when expanding the app’s view, selecting For streaming, and typing your country into the search bar — a list of servers will appear on the right-hand side.
 O CyberGhost inclusive otimiza servidores para Android TV e Firestick
Speeds are also impressive, so you can stream movies in Ultra HD. My global team and I averaged a 7% to 9% speed drop testing servers in our respective countries, including the US, the UK, France, and Germany. This drop of only about 7% helped us watch several movies without issues. Both the streaming-optimized and normal servers were fast enough for HD streaming. However, the streaming servers did load videos faster.
You can watch movies with CyberGhost free for 45 days. I tested this claim by contacting its 24/7 support to cancel and request a refund.
Useful Features
- Automatic protocol selection. This option automatically picks the best protocol for you based on your connection. This will help you maintain a stable connection and excellent speeds for high-quality streaming.
- Smart Rules menu. You can use this functionality to personalize your streaming experience. For instance, you can configure CyberGhost's Mac and Windows apps to auto-connect you to the fastest nearby server right away.
- Router compatible. Like ExpressVPN, you can set up CyberGhost on your router to watch movies on devices that do not natively support VPNs. This also allows you to use it on more than the 7 simultaneous device connections offered.
- MTU size adjustment. This optimizes your connection's throughput by adjusting the size of data packets sent over your network. Smaller packets help you maintain uninterrupted movie streaming.
- Secure access to streaming
- Military-level security
- Designed for ease of use
- Slower long-distance servers
- Doesn't work in China
3. NordVPN — Intuitive Apps Make It Easy for Beginners to Securely Watch Movies Online

| Best Feature | Simple interface makes it straightforward for secure streaming from anywhere |
|---|---|
| Speed | Its fast Nordlynx protocol cuts nearby server speeds by only 6% |
| Server Network | 9,379 servers in 211 to quickly find a fast one |
| Compatible With | Windows, Mac, Android, iOS, Linux, smart TVs, Fire TV Stick, routers, and more |
Establishing a connection for streaming movies with NordVPN is straightforward. Servers are neatly listed by country, and the interactive map allows for easy selection with a drop of a pin. In my tests, I typed my location into the search bar, and NordVPN connected me to the fastest server within seconds. Plus, you can use its interactive map to connect to your required servers simply by clicking on it (dropping a pin).
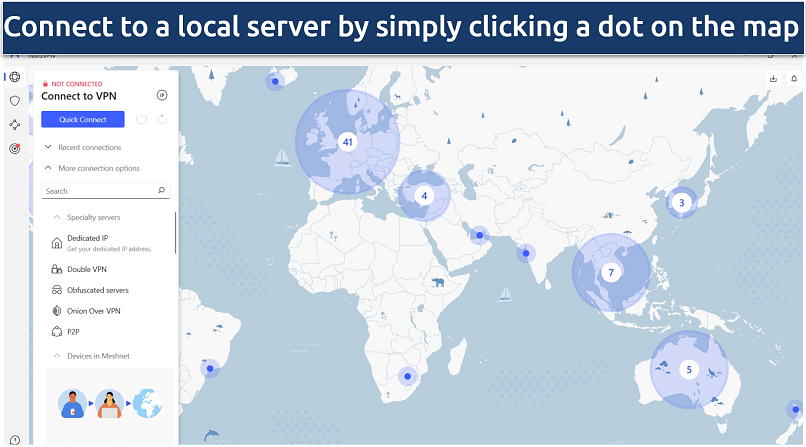 Uma lista de servidores especializados pode ser encontrada abaixo da barra de pesquisa da NordVPN
NordVPN’s obfuscation technology conceals your VPN traffic from detection on restrictive networks, like those in school and work. This is great as it can help you maintain your online privacy while watching movies during leisure moments, such as tea or lunch breaks. It also makes NordVPN capable of safely accessing streaming platforms from anywhere.
The Windows app's slow startup time was a bit disappointing. However, once it's up and running, it's smooth sailing. Plus, its Quick Connect feature connects you to the nearest optimal server. This eliminates the need to manually search for the right server for streaming, saving you time.
You can try NordVPN without risk using its 30-day money-back guarantee. If it fails to meet your expectations, getting a refund via the 24/7 live chat feature is easy. Each offer comes with 10 simultaneous device connections, a Smart DNS, and split tunneling, giving you better value for money.
Useful Features
- Choice of protocol. If NordLynx doesn't meet your network's needs, you can switch to the highly secure OpenVPN protocol. For instance, NordVPN's obfuscated servers require the exclusive use of the OpenVPN protocol.
- Presets. With this feature (only on macOS), you can create profiles for your favorite movie sites. For example, I made a preset for Netflix US, Disney+, and Hulu and set each one to connect me to the nearest US server.
- Threat Protection. This feature enhances your streaming experience by blocking ads, trackers, and malware that could interrupt your movies or cause buffering from using up your bandwidth.
- Strong security and privacy
- Fast local and faraway servers
- Great for streaming
- Some long connection times
- High renewal prices
4. Surfshark — Unlimited Device Connections to Stream Different Movies Simultaneously

| Best Feature | Stream on as many devices as you want |
|---|---|
| Speed | Excellent speeds to maintain video quality and avoid buffering |
| Server Network | 4,500 servers in 100 countries to watch movies securely online from anywhere |
| Compatible With | Windows, Mac, Android, iOS, Linux, smart TVs, Fire TV Stick, routers, Kodi, and more |
With Surfshark, you can connect unlimited movie devices. Perfect for a home where multiple screens are used to watch at once, I tested it by connecting Surfshark to 9 devices at once (including several smartphones, a Windows PC, Fire HD tablet, and Android TV) and had a stable connection. You can even use its Smart DNS to use Surfshark on streaming devices that don't support VPN apps.
 Com a Surfshark, cada filme carregou em 5 segundos ou menos
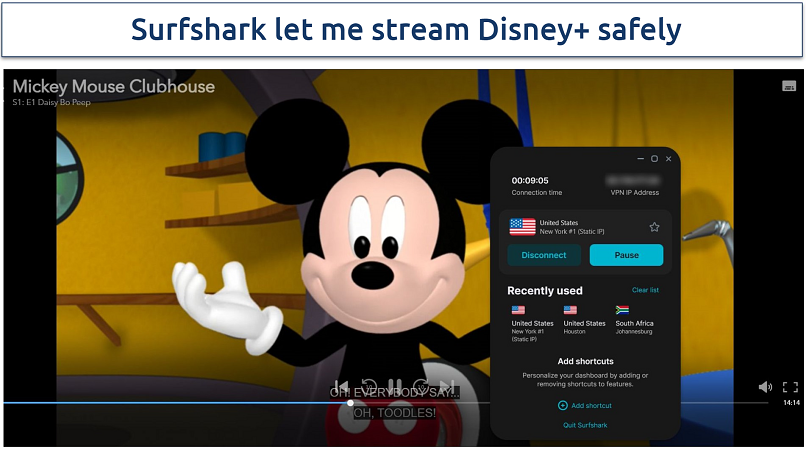
Surfshark’s compatibility with various streaming platforms is impressive. It’s able to access and stream movies from anywhere in UHD, without delays. I could securely stream Max, Hulu, Peacock, and Disney+. It even managed to work with Amazon Prime Video, which is notorious for blocking VPNs. This is thanks to its Camouflage Mode, which obfuscates your VPN traffic to avoid detection. This feature automatically kicks in whenever it detects any VPN restrictions.
An issue I noticed with Surfshark is that connecting to a server sometimes takes a while. Even US servers near me sometimes took about 15 seconds. However, it delivered excellent speeds, nearly as fast as ExpressVPN.
Surfshark is backed by a 30-day money-back guarantee. If it’s not the blockbuster you hoped for, claiming a refund through its 24/7 live chat feature is easy.
Useful Features
- Rotating IPs. Like ExpressVPN, Surfshark also refreshes your IP address at regular intervals while keeping you connected to the VPN. This constant rotation significantly bolsters your privacy while streaming. However, with Surfshark, you have to turn on the IP rotator manually.
- Clean Web. Activate this feature to stop annoying ads from interrupting your streaming experience. It can also help you avoid trackers and malware that might compromise your privacy when downloading copyright-free movies.
- Easy to use
- Military-grade security
- Fast speeds
- Clunky torrenting support
- Based in a 9-Eyes country
- Might not work in China
5. Private Internet Access (PIA) — Global Network Provides Reliable Connections for Watching Movies Online
| Best Feature | Includes optimized streaming servers in various countries, like the US and UK |
|---|---|
| Speed | Using WireGuard, my average download speed was reduced by only 9% |
| Server Network | 29,650 servers in 90 countries, including 53 US locations, to stream safely from anywhere |
| Compatible With | Windows, Mac, Android, iOS, Linux, smart TVs, Fire TV Stick, routers, Kodi, and more |
PIA's extensive network covers 90 countries, including servers in every US state, so finding a secure server to watch movies from anywhere won't be difficult. Its network even features location-specific servers optimized for streaming rather than site-specific ones like CyberGhost. While testing PIA's US East optimized server from New Jersey, I established a secure connection in seconds, and it was fast for uninterrupted streaming.
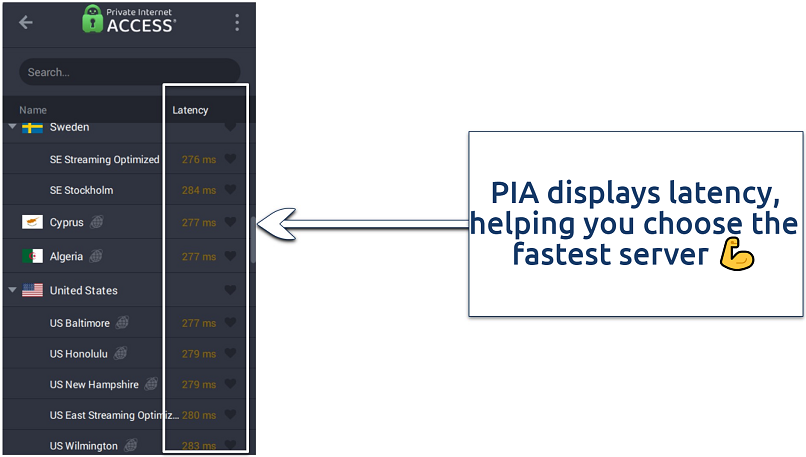 A PIA estabeleceu uma conexão de streaming em 5 segundos
It supports unlimited simultaneous connections, which means you can cover all VPN-compatible devices in your household. You can log in to as many devices as you like without it kicking you off.
A slight drawback is that PIA can be daunting to VPN beginners due to its many adjustable features. Although for streaming movies, you’re good to just use the default settings.
You can try it risk-free. I tested the refund policy and found it trustworthy. I went on instant live chat, clicked Transfer to agent, and got an immediate reply. After a quick chat, the agent approved my refund request, and my money was paid that same week.
Useful Features
- Quick Connect. This is my go-to feature when I want to avoid the hassle of choosing a server in my country for full HD or 4K streaming. It auto-connects you to the best available server based on your location and server load.
- 1-click favorites. This lets you save your favorite servers for quick access next time. Just click the heart icon next to the server.
- Many servers to choose from
- Customizable security settings
- Solid choice for torrenting
- Hit-or-miss customer support
- Tricky to navigate
VPNs Side-by-Side: Key Feature Overview
The table below offers a quick overview of each VPN's features for movie streaming. The ideal VPN for you hinges on various considerations. For instance, consider the number of people using the account and the devices you use to watch films. If you get slow internet speeds where you are, you may want a fast VPN to minimize additional speed loss.
What Can I Do if My Streaming VPN Isn't Working?
There are various fixes you can try if your VPN isn’t working. But the easiest way to avoid technical issues is to use a reliable movie VPN that’s proven to work with popular streaming platforms to watch content in HD from anywhere. Should you come across a problem, here are some possible solutions:
- Switch servers. Streaming platforms often block IP addresses they suspect belong to a VPN. You may be able to solve this simply by connecting to a different server.
- Adjust the VPN settings. Sometimes, all you need is a boost in security. You can try changing protocols, upping your encryption level (256-bit is the most secure), or switching ports. Though, not all VPNs offer this level of customization.
- Clear your cookies and use a private window. If you’ve recently been traveling, websites can leave cookies on your device with outdated location information. Try clearing cookies/deleting browsing data/clearing history (depending on your browser). Private or Incognito windows don’t gather data, which can also help.
- Use a different viewing method. For example, if you’re using the Netflix app, try logging in on a web browser or vice versa. Try another device or a different browser.
- Enable obfuscation. Today, many movie services block VPN-associated IPs to limit viewership to licensed regions. A VPN that offers obfuscation can help you maintain a secure connection to streaming services by making your VPN traffic appear like regular internet traffic.
- Router TAP Drivers Reinstallation. For router-based VPN setups, updating or reinstalling TAP drivers can resolve connectivity issues.
- Disable your device’s GPS tracking. On-device GPS can clash with the VPN-provided IP address. Turning off GPS can fix the problem.
- Contact support. Customer support may be able to find a solution or workaround, or you could simply alert your VPN to the issue so it can be fixed.
Is It Illegal to Use a VPN to Watch Movies?
Yes, VPNs are legal in most countries. Premium VPNs offer big server networks worldwide, so they are able to safely access streaming platforms from anywhere and stream movies in UHD. You can also use VPNs to secure your connection while streaming, and avoid ISP throttling.
On the other hand, in a few countries (like China and Russia), only government-monitored VPNs are permitted. These locations use VPN blocks to prevent the use of third-party services. That said, I recommend that you check the laws of your country and avoid using a VPN illegally.
Final Verdict
A reliable VPN with servers worldwide is capable of safely streaming high-quality movies from anywhere without interruptions. Pick one that won't negatively affect your speeds to maintain fast loading times and video quality.
ExpressVPN is the best VPN for streaming movies in 4K. Not only does it work with most popular movie sites, but it also provides impressive speeds and robust security features.
FAQs


Your online activity may be visible to the sites you visit
Your IP Address:
216.73.216.254
Your Location:
US, Ohio, Columbus
Your Internet Provider:
Some sites might use these details for advertising, analytics, or tracking your online preferences.
To protect your data from the websites you visit, one of the most effective steps is to hide your IP address, which can reveal your location, identity, and browsing habits. Using a virtual private network (VPN) masks your real IP by routing your internet traffic through a secure server, making it appear as though you're browsing from a different location. A VPN also encrypts your connection, keeping your data safe from surveillance and unauthorized access.
About the Author
Lawrence Wachira, a former Editor at vpnMentor, is dedicated to making the internet safer for everyone. His expertise in VPNs, online privacy, and editing enabled him to help the vpnMentor team deliver comprehensive insights, user guides, and comparisons that empower readers to take control of their digital safety.


Please, comment on how to improve this article. Your feedback matters!