Get IPVanish Free in 2026: 7-Day Trial & 30 Day Refund
- Getting a 7-Day IPVanish Free Trial
- Steps for Canceling IPVanish’s 7-Day Free Trial
- How To Try IPVanish Free for 30 Days With Its Money-Back Guarantee
- Step-By-Step Guide To Cancel IPVanish’s 30-Day Trial & Get a Refund
- Refund Denied? How To Resolve Issues
- IPVanish Free Trial vs Money-Back Guarantee: What You Need to Know
- IPVanish Free Trial vs Other Top VPNs in 2025: Key Differences
- FAQs
You can test IPVanish completely free for 7 days through its mobile apps for Android or iOS. I loved that this free trial has no restrictions. I was able to use its entire server network and extensively test all its features. In addition, you can use your free trial credentials on all supported operating systems, including Windows and Mac devices.
Does IPVanish have a 30-day trial? No, but IPVanish also offers a 30-day money-back guarantee with its longest purchase options. With this method, you pay upfront and have 30 days to request a refund if it doesn’t meet your requirements — I got my money back after just 3 days.
While you need to share your payment information for the free trial, you won’t be charged unless you fail to cancel before the 7-day period ends. It’s believed that more than 1.25 billion people use VPNs regularly (Windscribe, 2025)1, and IPVanish’s free trial and money-back policy offer excellent ways to test out a highly regarded VPN. In this guide, I'll show you how to get the trial and guarantee, plus a step-by-step guide to canceling.
Getting a 7-Day IPVanish Free Trial
You’ll need an iOS or Android device to get the IPVanish 7-day free trial. Once activated, it can be used on all supported devices. Can you use multiple connections with your free trial? IPVanish allows you to connect an unlimited number of devices at the same time during your free trial. That’s great because it’s reported that nearly 25% of people worldwide use VPNs (Analyzify, 2025)2. These statistics suggest that someone else in your household may also want to utilize it.
What features are available with the IPVanish free trial? Every feature IPVanish offers for paying customers is available during the trial. I loved that this allowed me to test out its Threat Protection feature, which is basically an ad blocker. It’s extremely rare to find these on free VPNs, and I was skeptical that it would work as well as one of the best standalone ad blockers. But I was pleasantly surprised that it blocked most pop-ups.
This trial is exclusive to first-time customers, but you can technically claim it twice, once on Android and once on iOS. However, it would be better if you used different payment methods for both devices.
1. Download IPVanish
Go to your phone’s app store and download IPVanish from either the Google Play Store or the Apple App Store. Once the app has been downloaded, open the app to proceed with the next steps.
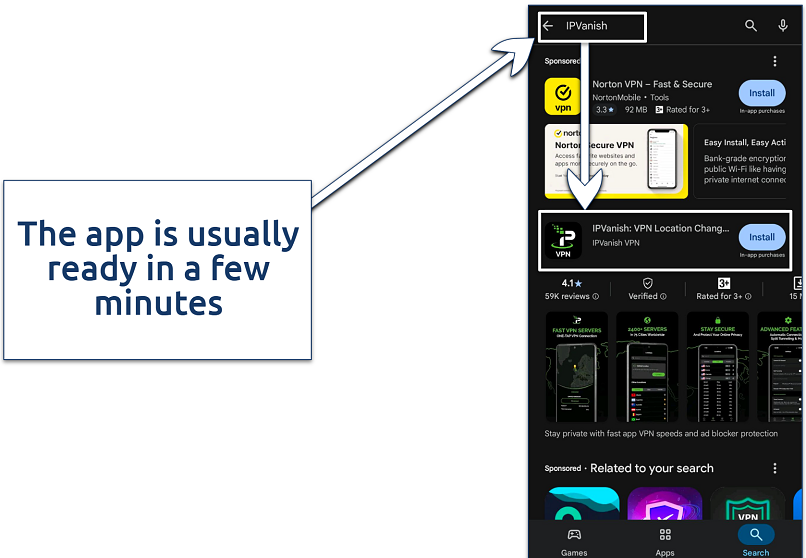 Open the app once it's downloaded
2. Start Your Free Trial
Launching the app will prompt you to choose between Start Free Trial or Log in. Click on Start Free Trial and choose the annual purchase option since it's the only one that comes with the free trial. You’ll also need to select a payment method, such as Google Pay or a credit or debit card. There’s nothing to worry about as you won’t be charged until your trial is over.
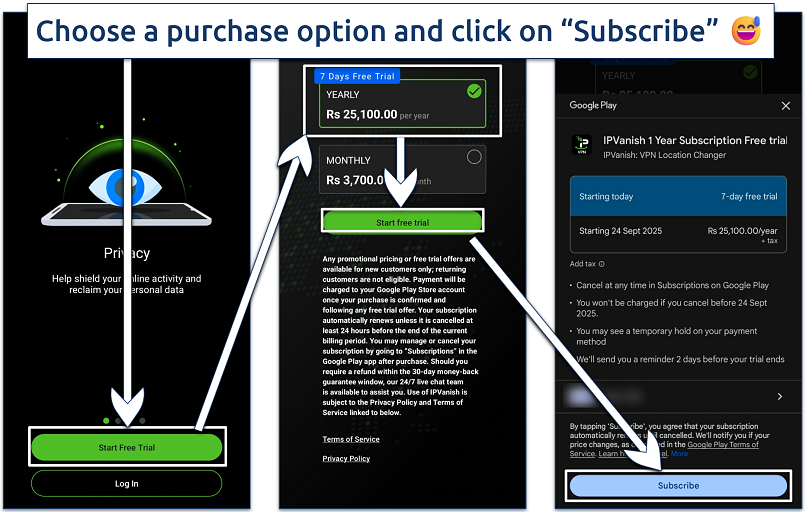 You will also need to add a new payment method or choose an existing one
3. Create an Account
After starting your trial, IPVanish will ask you to create an account. IPVanish will then display a simple tutorial (I skipped it and had no issues using the app). In any case, the main VPN interface will open after this. Here, you can configure the service by choosing a VPN protocol, enabling obfuscation (the Scramble feature conceals VPN traffic as regular internet to prevent detection), and more.
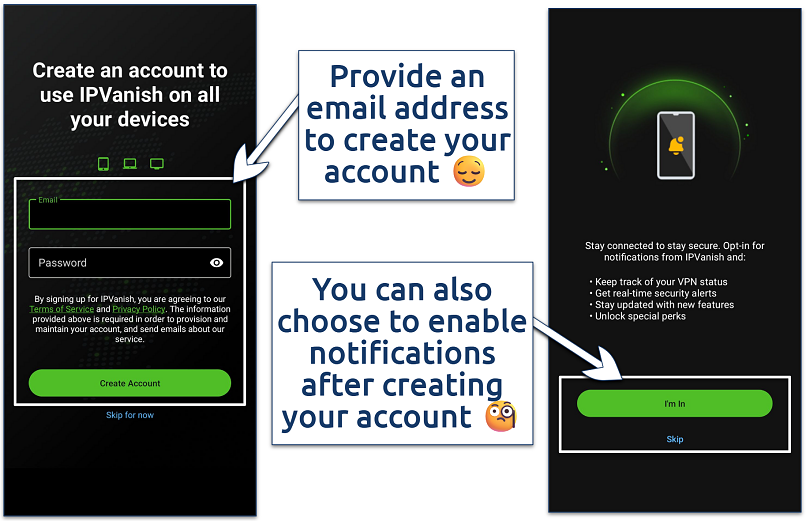 IPVanish also adheres to a strict no-logs policy to safeguard your online privacy
4. Connect to a Server
Choose your preferred server by clicking on the Locations button on the main VPN interface. All the servers we tested connected in under 5 seconds, which really impressed me. I’ve tested some VPNs that take a full minute to connect (yikes!).
This VPN can also be set up on specific routers, allowing you to use it on gaming consoles or older smart TVs that don’t natively support VPNs. If you’re only concerned with the basics, I’m confident that IPVanish can effectively safeguard your online privacy. I’ve never experienced any leaks with it after years of regular tests.
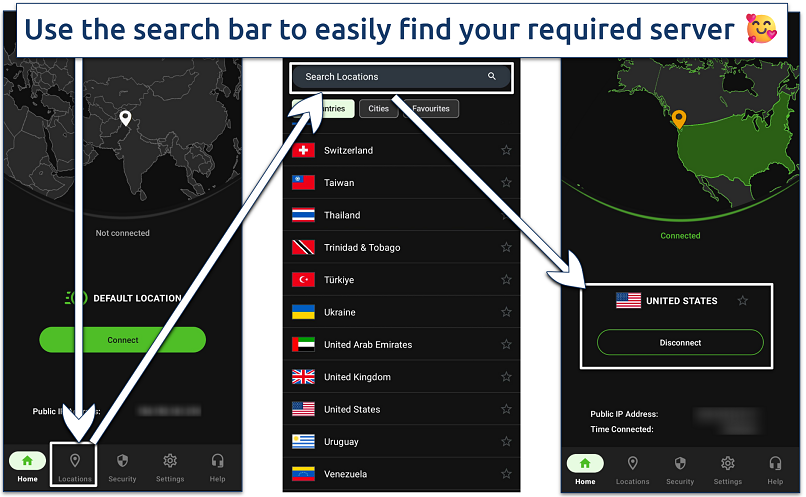 "Locations" also has a Double Hop feature for double encryption
5. Start Using IPVanish
You can now start using your IPVanish 7-day free trial. During tests, I used IPVanish on my Windows laptop to safely torrent, and I experienced only slightly longer download times than I did with no VPN connected.
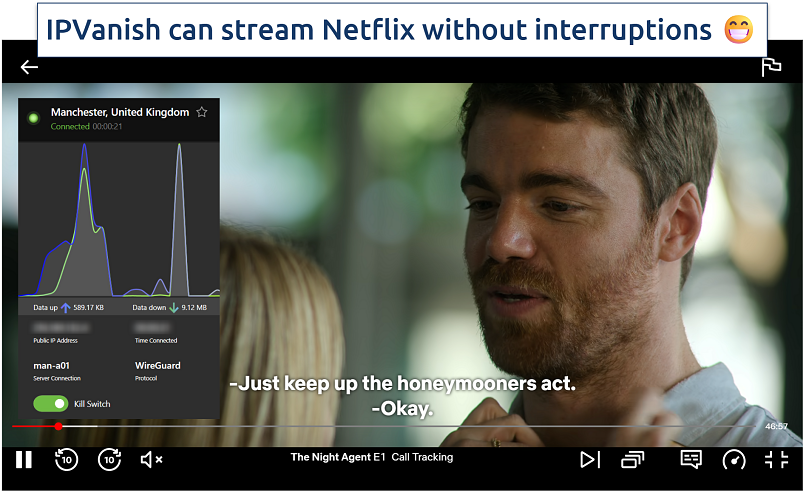 We did not experience any buffering issues during our 7-day trial
Steps for Canceling IPVanish’s 7-Day Free Trial
Canceling the 7-day IPVanish free trial is also very easy. Just remember to cancel your trial before the 7 days are up; otherwise, you’ll be charged. I didn't take any chances and canceled mine 24 hours in advance. The steps are identical for both iOS and Android; however, for this article, we have shared images from an Android device.
- Launch your Play Store. Depending on your device, open the Google Play Store or the Apple App Store and click on your profile icon. This icon is typically located in the top-right corner of the screen.
- Open your subscriptions. Clicking on your profile icon will open an options menu where you need to select Payments & subscriptions. Another menu will open, where you need to select the Subscriptions option to view the list of all your active subscriptions.
 You need to use the same Google or Apple ID that you used to get the free trial
 - Cancel your purchase. Locate the IPVanish subscription in the menu and click on it. Then, tap the Cancel subscription button and confirm any prompts to cancel your IPVanish purchase.
 You can also decline to answer when prompted for the reason for canceling
How To Try IPVanish Free for 30 Days With Its Money-Back Guarantee
You must pay upfront for the 30-day money-back guarantee, and it's not available if you used the 7-day free trial first. So, your email ID and payment method won’t be eligible for the money-back trial if you have already used the free trial. If IPVanish doesn’t meet your requirements, you can receive a full refund at any time during the money-back period.
Also, keep in mind that in-app mobile purchases made through IPVanish on Google, Apple, or the Amazon store are not backed by a money-back guarantee. Follow the steps below to test IPVanish risk-free for 30 days.
1. Visit The IPVanish Website
Go to the IPVanish website to sign up for IPVanish. Your purchases are only backed by the money-back guarantee if you obtain it from the IPVanish website. This is because you’re only eligible for the 7-day free trial if you download IPVanish from the Google Play Store or Apple’s App Store.
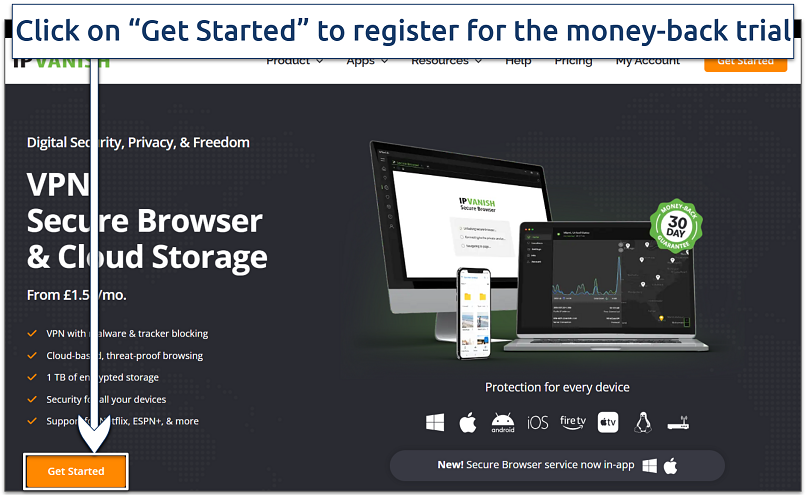 You'll be redirected to the page showing different purchase options
2. Choose a Purchase Option
IPVanish offers monthly, annual, and 2-year purchase options, which are further provided in Essential and Advanced Tiers. The Advanced tier offers additional features, which I discovered aren’t directly related to the VPN, like cloud backup and a secure browser. It's your call, but I opted for the 2-year Essential purchase option, as it offers the best savings.
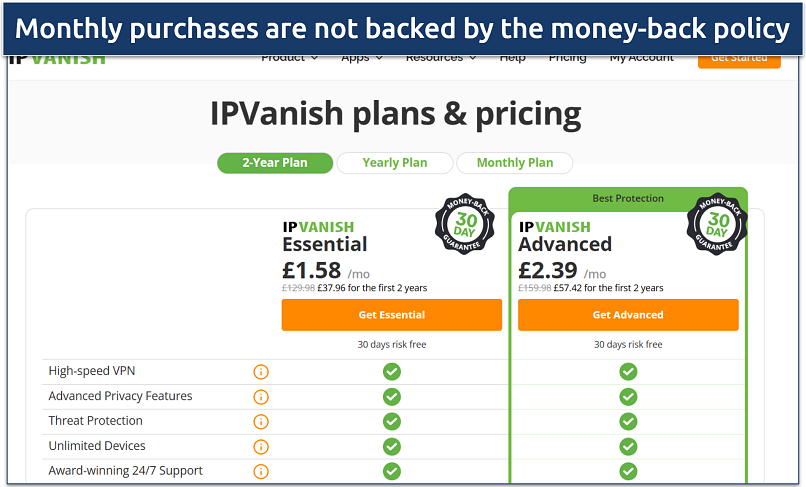 Choose the annual or the 2-year option to get the money-back trial
3. Create an Account
You will then be asked to choose a payment method, and once it's verified, provide your email address to create an account by setting up your password. You'll also need to confirm your email address to start using your IPVanish account.
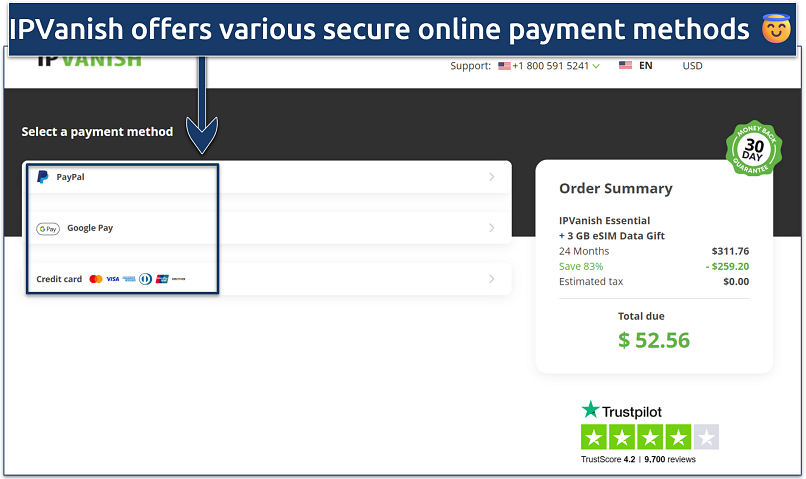 Unfortunately, you can't pay using cryptocurrency
4. Download and Install IPVanish
Download the IPVanish app on your device and install it. Once the app is installed, you will need to sign in using your login credentials. You can also configure the app by selecting your preferred protocol or enabling the Double Hop or Scramble feature (obfuscation helps keep your VPN undetectable), depending on your requirements. However, the default settings for IPVanish are already compatible with high-speed HD streaming, gaming, and downloading large files, so configuration is only optional.
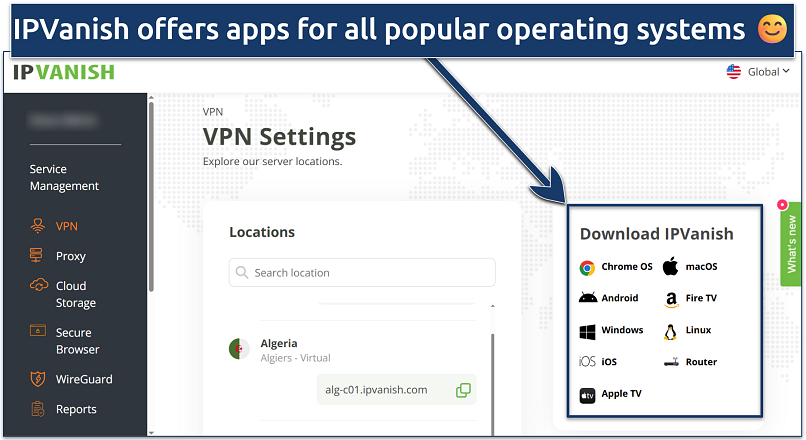 I was able to download and install IPVanish on Windows in under 5 minutes
5. Start Using IPVanish
Once you've signed in, connect to your preferred server, and try the VPN for 30 days. IPVanish supports HD streaming sessions as long as you have an average connection speed (50MBps or more). I was able to binge-watch YouTube videos without any buffering issues. While its Threat Protection feature worked great to block pop-ups, it couldn't do anything to stop the annoying in-video ads.
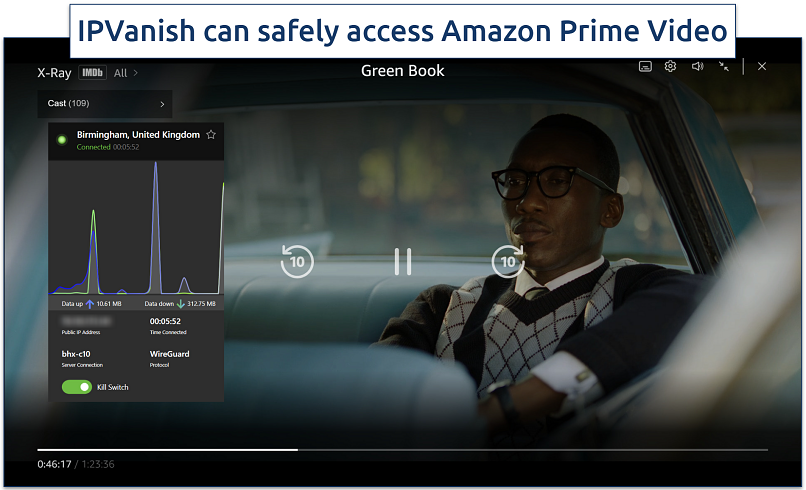 Our streams never took more than a couple of seconds to start
Step-By-Step Guide To Cancel IPVanish’s 30-Day Trial & Get a Refund
IPVanish offers an automated money-back guarantee. This means that if you cancel your subscription during the 30-day money-back trial via your account dashboard, your refund request is automatically approved. However, you can also cancel your subscription through the live chat option. I did it this way because I’m a little paranoid about my money, but it’s probably not necessary.
Follow the steps below to cancel your 30-day trial and get a refund.
- Open your account dashboard. Visit the IPVanish website, sign in, and go to your account dashboard.
 You will need to sign in using your email and password as well
 - Stop Auto-renewal. On your account dashboard, toggle the auto-renewal button off.
 Click on "Change plan" to proceed with the cancellation
 - Cancel your subscription. Once on the options page, click the Cancel subscription button and confirm any further prompts to cancel your IPVanish subscription. This method will automatically approve your refund if you’re canceling within the guarantee period.
 You will also need a reason to proceed with the cancellation and automatic refund
 - Contact support (optional). Contact support through the live chat to confirm if the refund has been approved under the automatic money-back guarantee, just to be on the safe side. All IPVanish refunds are processed within 7 working days, but I received my refund in just 3 working days, so I have no complaints regarding the refund process.
Alternatively, you can also contact support and request that they cancel your subscription after stopping the auto-renewal. Provide them with the required information, and they can cancel your purchase and approve the refund within minutes. Your account will be deleted, and your credentials will no longer work as soon as your refund request is approved.
Refund Denied? How To Resolve Issues
Although users have rarely experienced issues with the IPVanish money-back guarantee, there are some instances when a refund can be denied. Read ahead to know why your refund may be rejected and how to avoid it.
- Mobile App Store purchases. IPVanish only offers the money-back policy for website purchases. So, your refund can be denied if you’ve purchased IPVanish through Google Play, Amazon, or the Apple App Store.
- Late cancellation. IPVanish’s refund policy clearly states that you need to cancel your subscription at least 24 hours before your trial ends. To receive your refund, please remember to cancel your subscription within the specified time limit.
- Monthly purchase option. IPVanish monthly purchases are not eligible for a refund. Make sure to choose a purchase option that is backed by the 30-day money-back guarantee to avoid any issues getting a refund.
Why are you charged even after canceling IPVanish? This can happen if your auto-renewal feature isn’t disabled. This is why it’s better to disable auto-renewal manually before canceling your IPVanish purchase and claiming a refund.
IPVanish Free Trial vs Money-Back Guarantee: What You Need to Know
Is it better to use IPVanish’s money-back guarantee or the 7-day free trial? The 30-day money-back guarantee gives you more time to test the VPN, but you need to pay in advance. The 7-day trial is an excellent option if you only need a VPN for a short time and feel it's long enough to test all IPVanish has to offer. However, please note that if your account is charged after the free trial, you won’t be eligible for a refund.
I prefer the 30-day risk-free refund option because I’m a tech nerd, and I want to test my VPN under various conditions. A week just isn’t long enough for me. Remember that only website purchases, excluding monthly options, are eligible for the money-back guarantee. Ultimately, whether you choose the money-back guarantee or the free trial, it comes down to your specific requirements.
IPVanish Free Trial vs Other Top VPNs in 2025: Key Differences
In addition to IPVanish, other top-tier VPNs also offer free trials. The table below compares the most prominent features of all these VPNs that you can test while using them.
FAQs
References
Your online activity may be visible to the sites you visit
Your IP Address:
216.73.216.191
Your Location:
US, Ohio, Columbus
Your Internet Provider:
Some sites might use these details for advertising, analytics, or tracking your online preferences.
To protect your data from the websites you visit, one of the most effective steps is to hide your IP address, which can reveal your location, identity, and browsing habits. Using a virtual private network (VPN) masks your real IP by routing your internet traffic through a secure server, making it appear as though you're browsing from a different location. A VPN also encrypts your connection, keeping your data safe from surveillance and unauthorized access.



Please, comment on how to improve this article. Your feedback matters!