
How to Set up a VPN on Your Mac: Easy Guide 2026

Mac users face the same risks online, and the same annoying content geoblocks, as users of any other device. But for a long time, there were few options to protect your Mac and unlock restricted sites and services.
As is often the case with new software, the first VPN clients offered for casual users were developed for Windows and Android platforms – and Mac users were left out in the cold. If you wanted to use a VPN on your Mac, you had to configure the VPN protocols yourself.
The VPN world has come a long way in the last few years, however. Premium VPN providers now offer user-friendly, intuitive VPN apps for Mac OS that are easy to install, launch, and use. We’ll highlight the best of those apps in a moment.
So that’s the good news. The not-so-good news is that if you run an old version of OS X, it might be incompatible with your chosen VPN provider’s preconfigured app. In that case, you’ll still need to use your Mac's unique capabilities for manual installation.
Don’t worry, we’ll walk you through the whole process step by step.
So whether you’re a master of the Mojave or an old-fashioned Leopard trainer, here are the VPNs you can count on to protect your Mac and bypass geo-restrictions, along with everything you need to know to get your Mac VPN set up and running in minutes.
How to Install and Set Up a Mac VPN App
The setup process for other premium VPNs that offer dedicated Mac OS clients.
- Choose your VPN purchase offer and sign up.
- When your payment has been confirmed, you will get a link in your email inbox inviting you to choose a secure password and set up your account.
- Get your VPN Mac app.
- Open the.dmg package and install the software.
- Launch the app and log in with the username and password you previously set up.
- Familiarize yourself with the preconfigured settings. Next, choose a location from the country list. Then just click “connect” to encrypt your connection and mask your identity.
Manual installation requires use of a third-party app like Tunnelblick or Viscosity. You’ll find an easy-to-follow guide for each of them below. If you’d prefer to start with a no-cost option before committing to a subscription, check out our guide to the best free VPNs for Mac & Safari.
Advantages & Disadvantages of Manually Installing a VPN for Mac
Manually configuring your Mac VPN has one major drawback: you might need to input your settings each time you change servers, which can be time consuming.
To be sure that you have the best protection possible, make certain that the settings and configuration are correct each time you connect. Even a small error can leave you exposed.
For this reason, if your OS X version is supported, premium VPNs strongly recommend that you use their preconfigured Mac VPN apps.
However, we understand that every user is unique, and even if your OS would allow you to use a native Mac client, you might have your own reasons for setting up your VPN manually. For example, you might simply want additional control in choosing your server and protocol.
As supporters of internet freedom, we support freedom of choice. So whatever your reasons are for manually installing a VPN on your Mac, here's everything you need to know.
How to Manually Install a VPN on Your Mac
Keep in mind that even if you offer to set up your VPN manually, you still need to subscribe to a VPN provider to gain access to its secure network of servers.
We will use OpenVPN for our manual setup. OpenVPN is an open-source protocol with excellent security that uses multiple encryption methods. It remains the industry standard and is used most frequently in native apps offered by premium VPNs.
To connect via OpenVPN manually, you will need to use a client such as Tunnelblick, specially designed for Mac users, or Viscosity, which can be used on Windows and Mac platforms. Here are the steps for both methods.
Manual Installation Using Tunnelblick
- Download Tunnelblick and the Mac OS Configuration files package.
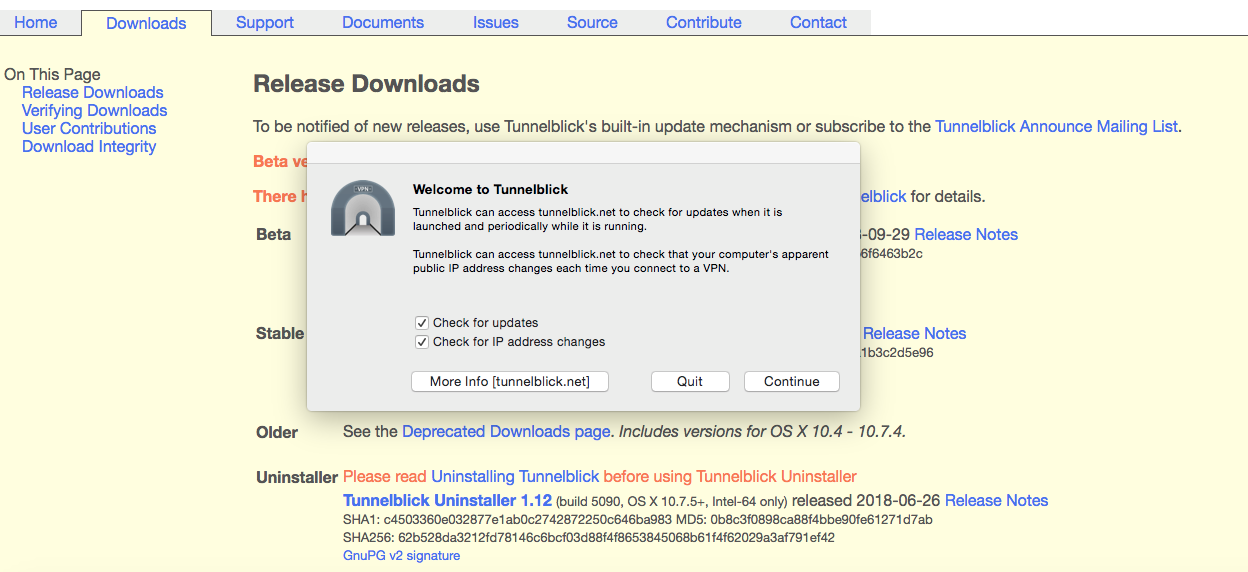 Just search for Tunnelblick in the Mac OS area
 - Unzip the VPN configuration files.
- Open the Tunnelblick.dmg file package and follow the prompts to install the application.
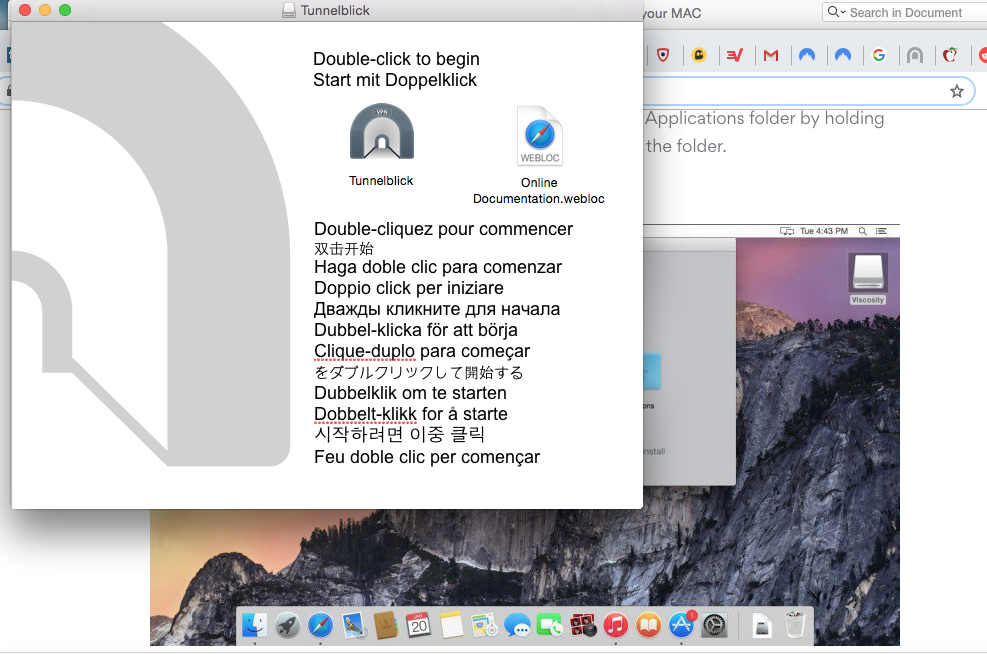 The instructions were easy to follow and I had it running in minutes
 - Enter your system password into the dialogue box to continue.
- Find VPN Details in the drop-down when you click the Tunnelblick icon in your menu bar. When prompted by Tunnelblick, drag and drop your VPN configuration files to add them to the VPN Details window.
- Select a server from the drop-down list and enter your your VPN account details to connect. Note that you will have to repeat this process each time you switch servers.
- You’ve done it! Manual configuration is complete.
Manual Installation Using Viscosity
- Download Viscosity (OS X 10.7 or newer is required) and the Mac OS Configuration files package.
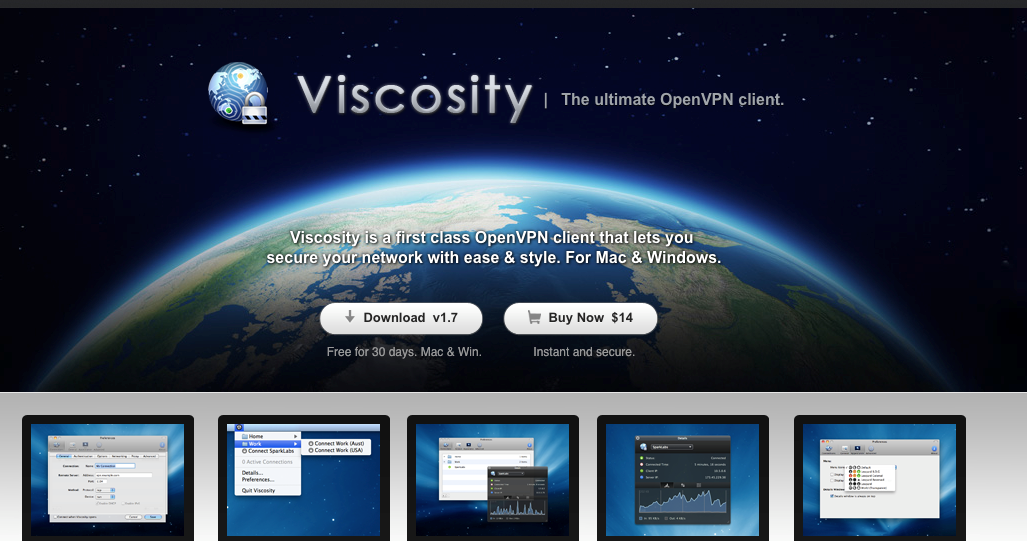 Just follow the simple instructions to install Viscosity
 - Unzip the configuration files package.
- Open the Viscosity.dmg file, install the application, and follow the prompts to launch it from your applications folder.
- Allow the Viscosity Helper Tool Installation when prompted.
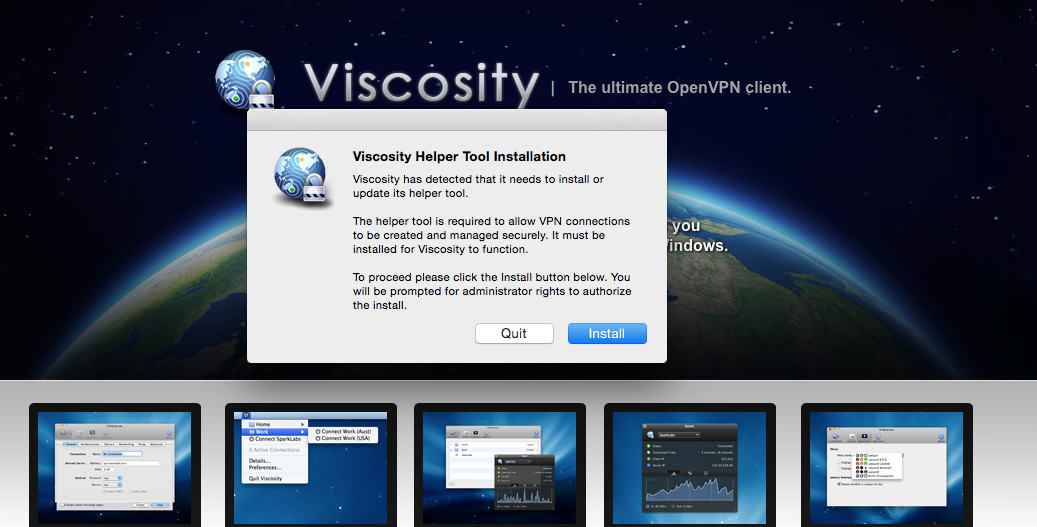 The Helper Tool gives you everything you need to manage your VPN connections
 - Click on the Viscosity icon in the menu bar, then click Preferences.
- Click the plus sign in the preferences window, then click Import Connection and then From File…
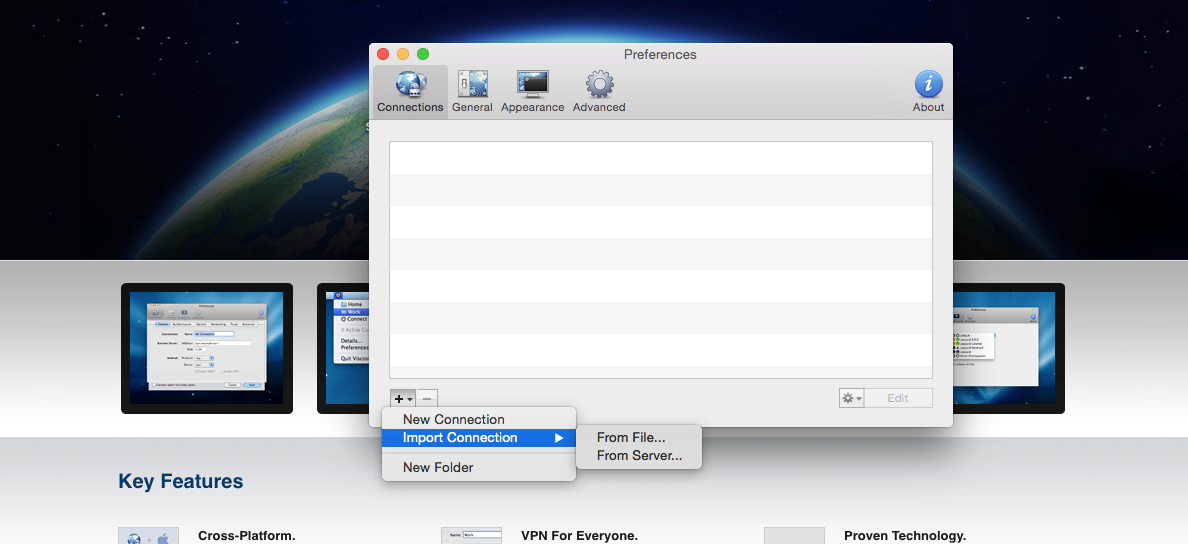 Importing files was straightforward and didn't take very long
 - Choose the unzipped configurations folder.
- When the files are successfully imported, navigate to the Viscosity icon in the menu bar and choose a server from the drop-down list. Manual installation is now complete!
Summary
When it comes to browsing the internet with freedom, privacy, and security, utilizing a VPN continues to be the optimal choice. That's why it's fantastic news that installing and configuring a VPN on your Mac is now significantly easier than it was in the past.
Mac users were once an afterthought when developers dreamed up slick VPN apps. Now that the top-rated VPN providers all offer great clients for Mac OS users, you have your choice of several secure, fast, and user-friendly services that you can set up almost instantly.
To learn more about the differences between OpenVPN and IKEv2 and see side-by-side comparisons of all the major protocols offered by VPNs today, check out our experts’ guide to protocols.
About the Author
Kristina Perunicic is a former editor for vpnMentor. She’s a cybersecurity expert with an interest in VPNs and their importance in the digital privacy landscape.


Please, comment on how to improve this article. Your feedback matters!