How to Install a VPN on Meta Quest: Easy Setup & Use (2025)
Meta Quest (formerly known as Oculus Quest) doesn’t offer native support for VPNs. However, there are several different workarounds you can use to easily set up a quality VPN on your Meta Quest, allowing you to secure your VR activity.
That being said, if you’re going to go through the process of setting up a VPN on your Meta Quest, you should make sure you pick a quality one. That way, you’ll be getting the best protection and performance when gaming, streaming on Bigscreen, or web surfing. The best VPNs also give you reliable access to IP addresses in other countries, allowing you to use VoIP services, play with international friends, or connect to your home game servers while traveling.
That’s why I’ve put together this useful guide to installing a quality VPN for Meta Quest. I’ll talk you through the different setup options and also give you some recommendations for VPNs that work well with the headset. Of all the services I tested, ExpressVPN is my top choice for Meta Quest. It delivers impressively fast connection speeds across its servers: crucial for a seamless, responsive, and lag-free VR experience.
Quick Guide: How to Use a VPN on Meta Quest in 3 Easy Steps
- Download a VPN. I recommend ExpressVPN for Meta Quest due to its fast speeds for smooth virtual gaming and streaming. ExpressVPN can be tried risk-free, thanks to a 30-day money-back guarantee*.
- Set up the VPN and connect to a server. Sideload the VPN onto your Meta Quest using SideQuest, then connect to a server near your location for the best speeds.
- Start your VR experience. Start gaming or streaming without interruptions.
How to Install a VPN on Meta Quest
While the Meta Quest lacks native VPN support, there are a few workarounds you can use. These methods include sideloading a VPN onto your Quest using SideQuest, sharing a VPN-protected WiFi connection from another device, or installing a VPN on your router.
Method 1: Set Up With an APK File (Using SideQuest)
You won’t find VPN apps in the regular Quest store but you can install a VPN directly on Meta Quest using an APK file. This process involves getting the APK file of a VPN app and using SideQuest, a tool for sideloading applications onto Meta Quest.
Sideloading is a great option as it allows you to control the VPN from within your Quest device (including switching server locations). On the downside, the VPN app will take up space on your headset and can use up vital resources like memory and processing power.
It’s also important to note that only a few select VPNs provide legit APK setups (getting APKs from unofficial websites is not advisable as they can contain malware). Always get your APK files from a trusted source.
Here's how to get and install a VPN APK file on Meta Quest:
- Create a developer account on the Meta Quest developer sign-up page. You can log in with an email address or your Facebook or Instagram account.
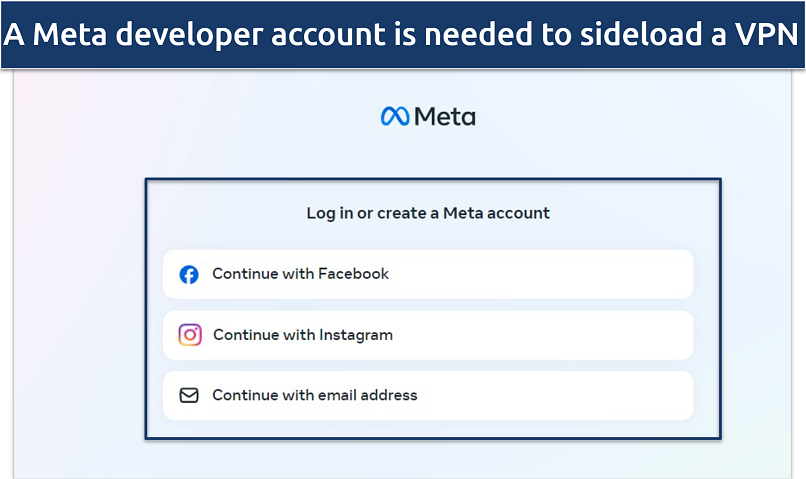 Your Meta developer account enables you to access backend developer services
 - Open the Meta Quest app on your smartphone and enable Developer Mode (sign in if asked to). You can do this by going to Settings > System > Developer and toggling USB Connection Dialog.
- Next, download SideQuest from the official website and install it on your Windows, Mac, or Linux computer. Make sure you download and use the advanced installer, as this provides the version of SideQuest that offers the ability to install APK files.
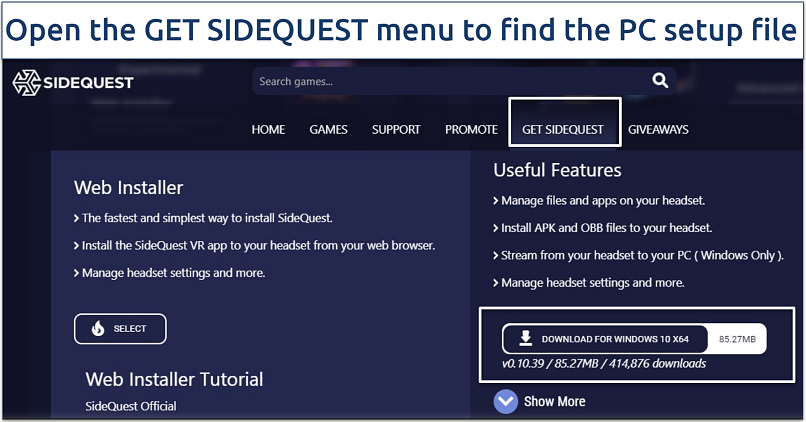 SideQuest enables you to install apps and games that aren't natively compatible with Meta Quest
 - On the computer with SideQuest installed, download a VPN APK file from your chosen provider's website (I recommend ExpressVPN).
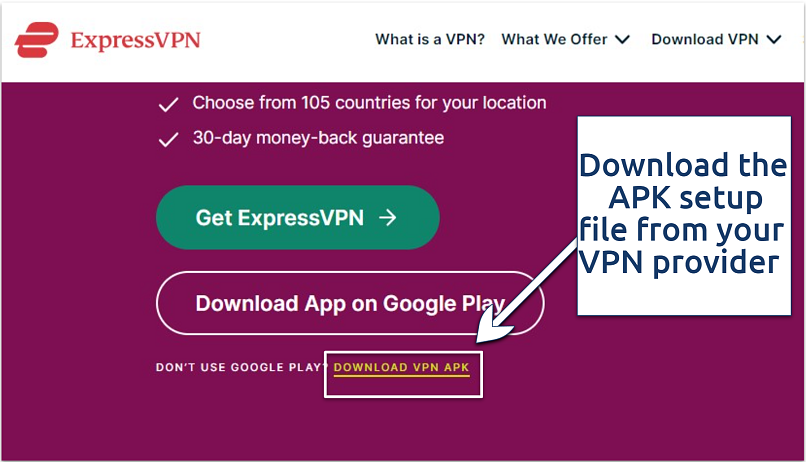 Be cautious with APK files from unofficial websites because they may contain malware
 - Connect Meta Quest to the computer. Use a USB-C cable to connect your Quest device to your computer. Make sure it's turned on and ready to transfer files.
- Launch the SideQuest app and click the icon of a box with a downwards arrow, located at the top-right (it should say “Install APK file from folder on computer” when you hover over it). Use this feature to navigate to the location of your VPN APK file and select it for installation.
- Navigate to the apps library in Meta Quest and look under Unknown Sources to find your newly installed VPN app. Open it and log in with your credentials.
- Connect to a VPN server and safely access content (the closer the server is to your real location, the faster your speeds will be).
Method 2: Share a VPN Connection via Virtual WiFi Hotspot
Another practical workaround for using a VPN on Meta Quest involves sharing a VPN-enabled WiFi connection from your Windows or Mac computer.
This is a good solution if you want to save space and processing power on your Quest device, as the VPN runs on your desktop or laptop instead. On the downside, it means you need to keep the external device running while you use your Meta Quest. You also can’t control the VPN from within the headset this way.
Here’s how to share a virtual WiFi hotspot on Windows or Mac devices:
On Windows 10
The first step is to set up a virtual router.
- Go to Settings > Network & Internet > Mobile Hotspot (or search for ‘hotspot’ in the Windows 10 search bar).
- Turn on Share my Internet connection with other devices.
- Under Share my connection over, select Wi-Fi.
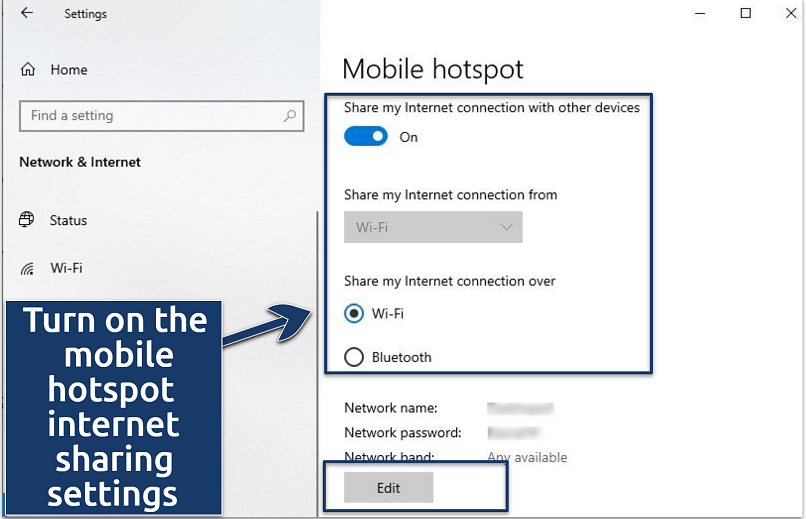 You can share VPN-secured WiFi connections with devices that don't support VPNs
 - Click Edit to set your desired network name and password for the virtual router.
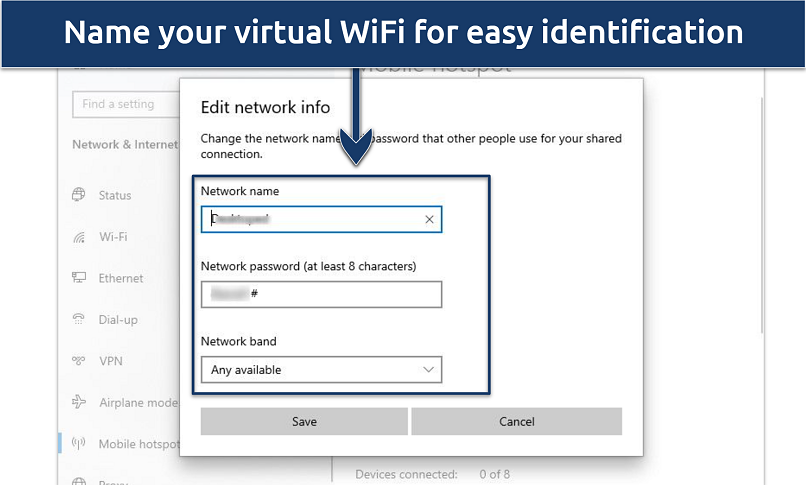 Click Save after creating and naming your mobile hotspot
Next, configure your adapter options.
- Go to Settings > Network & Internet > Change adapter options to view all network adapters on your PC.
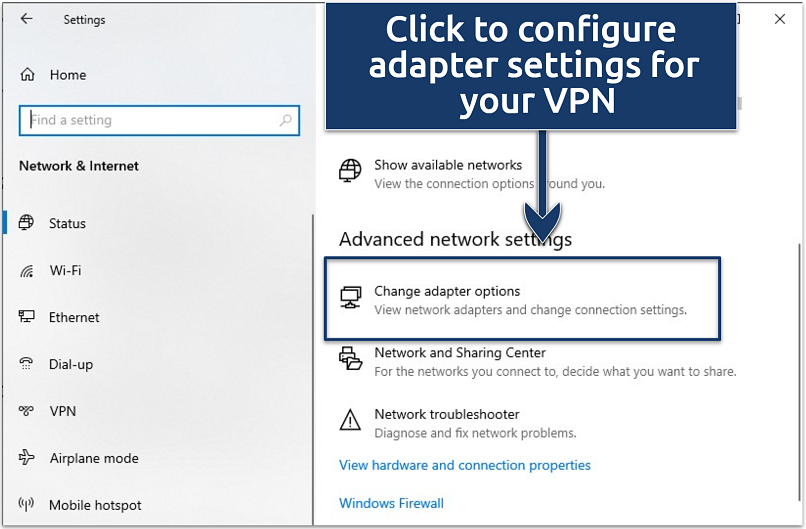 Scroll down to the bottom-right to find Change adapter options
 - Right-click on the network adapter corresponding to your VPN (it’ll be labeled something like “Your VPN Name” TAP Adapter) and select Properties.
- Go to the Sharing tab and check the box Allow other network users to connect through this computer’s internet connection.
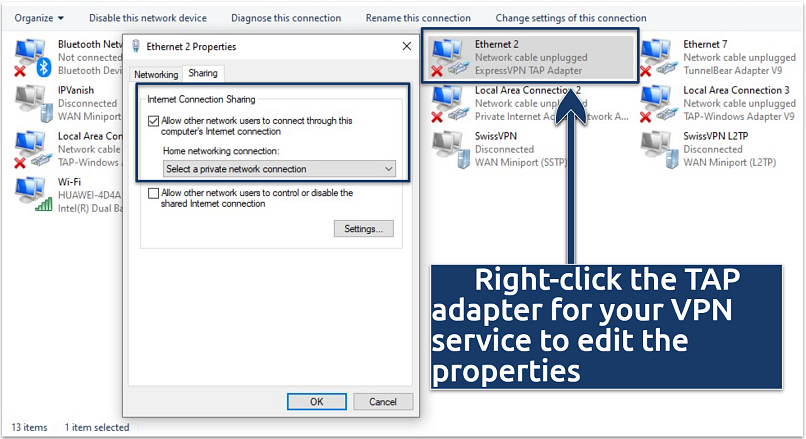 Switch to the OpenVPN protocol on your VPN after configuring the TAP adapter settings
 - In the dropdown menu under Home networking connection, select the network you created (often labeled as Local Area Connection [number]).
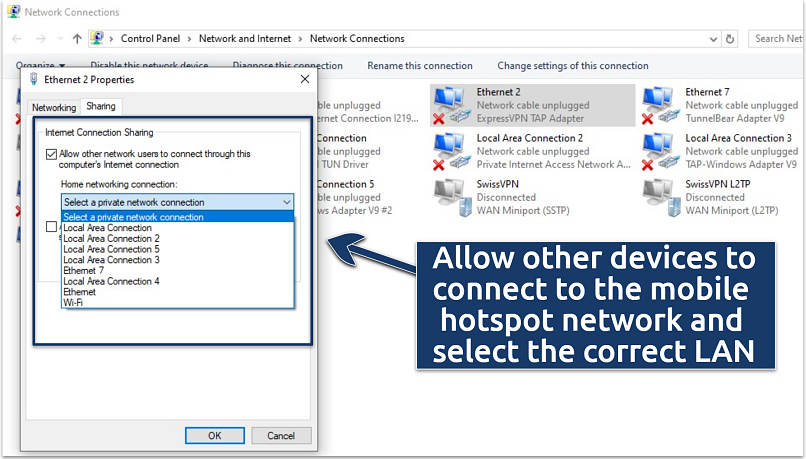 Public sharing must be enabled before other devices can use the connection
Then, connect to the VPN and start the hotspot.
- Launch the VPN app on your computer and switch to the OpenVPN protocol.
- Connect to your preferred VPN server
- Connect your Meta Quest to the WiFi network you just created.
On Mac
- Configure your VPN connection. Install and connect to a VPN on your Mac. Choose a server based on your preference (speed or location).
- Set up internet sharing. Go to System Preferences > Sharing. Select Internet Sharing on the left-hand side list and then choose the VPN connection from the Share your connection from list.
- Activate WiFi sharing. In the To computers using list, check the WiFi option then click WiFi Options to set the network name and password.
- Start internet sharing. Tick the checkbox next to Internet Sharing to start sharing your VPN connection over the created WiFi network.
- Connect the Meta Quest to your Mac’s hotspot. Go to the WiFi settings in your Meta Quest device and connect to the hotspot you created.
Method 3: Install the VPN on Your Physical Router
It’s also possible to install a VPN directly onto your router. This then extends the VPN coverage to all connected devices, including your Meta Quest 2, 3, or Pro.
There are a couple of downsides though. Firstly, installing a VPN on a router requires some manual configuration, which can be technical and tricky (unless you buy a router with a VPN pre-installed, like ExpressVPN’s Aircove routers). It’s also not as easy to change server locations with this method (you’ll have to do this manually in the router settings too). If you’re looking to secure your entire network in addition to your Meta Quest though, this is the solution that makes the most sense.
- Make sure your router is VPN-compatible. Get a router that supports a VPN setup. Routers with Open Source firmware like DD-WRT or Tomato should work.
- Select a VPN that supports routers. Not all VPNs work with routers. I used ExpressVPN because it provides a dedicated router app for simple configuration.
- Install the VPN on your router. Follow the directions for installing a VPN on a router as stated by your VPN service provider. It's often as simple as logging into your router's admin panel and configuring the VPN settings. If you're using ExpressVPN, its dedicated router app simplifies this process.
- Connect your Meta Quest to the router. Once your router is VPN-enabled and you've chosen a server location, connect your Meta Quest to the router's WiFi network. This automatically secures your VR traffic and online activities.
- Verify the connection. Test if your VPN is working correctly by using an IP checker tool to make sure your IP address and location match your chosen server.
- Start using your Quest safely. Once you’ve established that everything is fine, you can securely browse, stream, or play Fruit Ninja with your headset.
Best VPNs to Use on Meta Quest in 2025
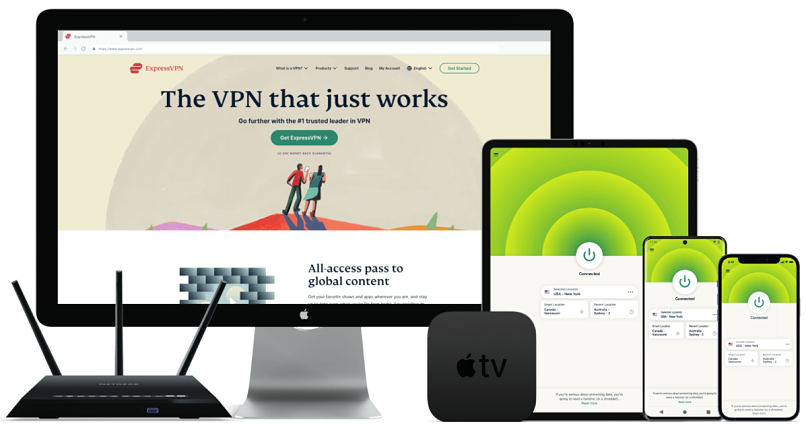
1. ExpressVPN — Fast Connections for a Seamless VR Experience on Meta Quest
Tested June 2025
| Best Feature | Speedy connections for seamless gaming and streaming online |
|---|---|
| Speed | 114Mbps (3% slower than my usual connection) |
| Server Network | 3,000 servers in 105 countries |
| Compatible With | Windows, Mac, Linux, Android, iOS, Chrome, Firefox, smart TVs and devices (like Fire Stick), routers, consoles (PS and Xbox), and more |
ExpressVPN provides excellent connections and unlimited bandwidth for VR activities like gaming and streaming. Although most VPNs tend to slow you down due to encryption, my speeds easily reached 114Mbps (a mere 3% dip from regular speeds of 118Mbps). Even the distant servers supported lag-free gaming when I tested ExpressVPN. I used the proprietary Lightway protocol when setting up on Meta Quest because it’s faster than the other options.
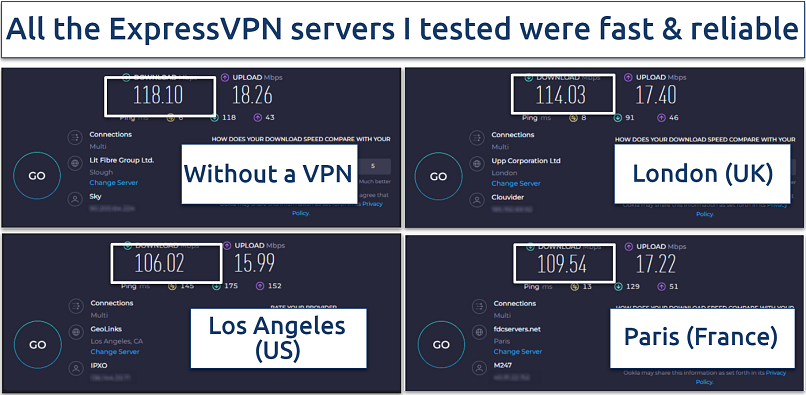 ExpressVPN servers also offer low latency, ideal for online gaming
The VPN safeguards traffic between your Meta Quest headset and online sites using 256-bit AES encryption and perfect forward secrecy (which randomly generates new encryption keys). That means third parties and apps can't monitor your online activities, like playing Supernatural on Meta Quest. The encryption also prevents ISP throttling, whereby internet providers deliberately restrict speeds during high-bandwidth activities like gaming.
The VPN has dedicated apps for some routers so you can easily use ExpressVPN on Meta Quest 2, 3, or Pro. Plus, the VPN offers an APK setup option and a user-friendly Android app for sideloading onto your Meta Quest.
A downside to the service is that it’s relatively expensive. However, you can take advantage of the regular discounts and promotions. For example, I got up to 61% off and paid just $4.99/month for the yearly plan (which covers 8 simultaneous connections). ExpressVPN can even be tested risk-free because it's backed by a 30-day money-back guarantee.
Useful Features
- Obfuscated servers. ExpressVPN servers use a special tech to disguise your VPN traffic as regular web traffic, so you won't encounter problems on networks that restrict or block VPNs.
- Threat Manager. If you share the VPN from a Mac, Windows, or Linux device, you can also protect your Meta Quest with ExpressVPN’s tracker, ad, and malicious link-blocking security suite.
- Network Lock. This kill switch feature shuts down your internet connection if there’s a problem with the VPN, preventing your data from being leaked. ExpressVPN also provides DNS/IPv6/WebRTC leak protection.
- TrustedServer technology. All of the VPN’s servers are RAM-only and session data is wiped during regular reboots. This backs up the strict zero-logs policy, meaning ExpressVPN doesn’t monitor or store anything you do while connected.
2. CyberGhost — Dedicated Gaming and Streaming Servers to Use on Your Meta Quest
| Best Feature | Dedicated servers for gaming and streaming on Meta Quest |
|---|---|
| Speed | 108Mbps (9% slower than my usual connection) |
| Server Network | 11,690 servers in 100 countries |
| Compatible With | Windows, Mac, Linux, Android, iOS, Chrome, Firefox, smart TVs, routers, consoles, and more |
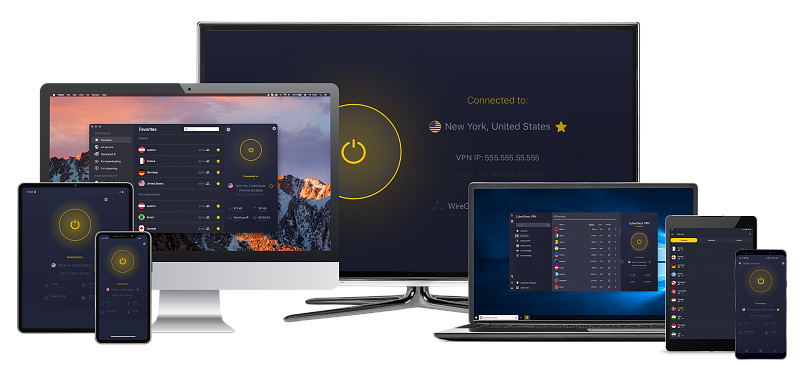
CyberGhost offers specialized gaming and streaming servers. They’re optimized to minimize latency during gaming or to work with certain streaming platforms. I didn’t experience any lag while testing CyberGhost’s dedicated gaming servers. In addition, its servers are spread across 100 countries, giving you reliable connections near you.
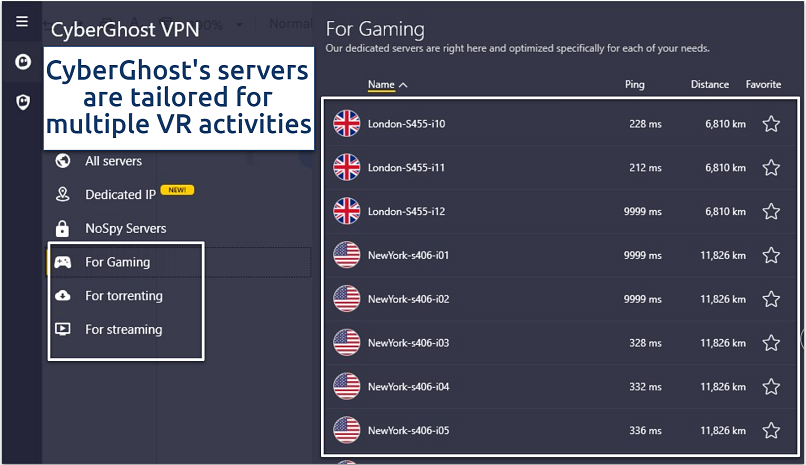 Use the nearby servers for lower ping and faster VR gaming speeds
While CyberGhost's speeds may not match ExpressVPN, they are still impressive. I experienced speeds of around 108Mbps, more than enough for demanding online activities like 4K streaming on Meta Quest. The Best Server Location feature simplifies finding an optimal connection by recommending the most suitable server in your selected region.
The user-friendly CyberGhost apps simplify setting up a VPN on Meta Quest. You have multiple setup options, including configuring it on a router or creating a shared virtual WiFi hotspot on a Windows or Mac PC. The dedicated gaming and streaming servers are also easy to find on the searchable and labeled server list. If you need any help, there’s a support team available 24/7 via live chat.
All plans cover 7 devices but subscribing to the service every month is quite expensive, and the money-back guarantee for monthly contracts is only 14 days. However, CyberGhost’s long-term plans are much more affordable, starting at $2.19/month. Also, the money-back guarantee runs up to 45 days, so you get a much longer time to test the VPN out for yourself.
Useful Features
- Dedicated IP. You can get an IP address unique to you for an extra fee. This is useful when you need consistent access to IP-restricted services (like online payment sites) and don’t want to have to go through frequent security verifications.
- Robust encryption. CyberGhost uses military standard (AES 256-bit) encryption to secure connections on Meta Quest, providing strong protection against snooping and hacking when accessing sensitive information (like payment services) via your VR set.
- No logs policy. Like ExpressVPN, CyberGhost uses RAM-only servers and has a strict no-logs policy.
3. Private Internet Access (PIA) — Customizable Security To Safely Play and Stream on Meta Quest
| Best Feature | Highly adaptable protection features to use with your Meta Quest |
|---|---|
| Speed | 100Mbps (15% slower than my usual connection) |
| Server Network | 29,650 servers in 91 countries |
| Compatible With | Windows, Mac, Linux, Android, iOS, Chrome, Firefox, smart TVs, routers, consoles, and more |
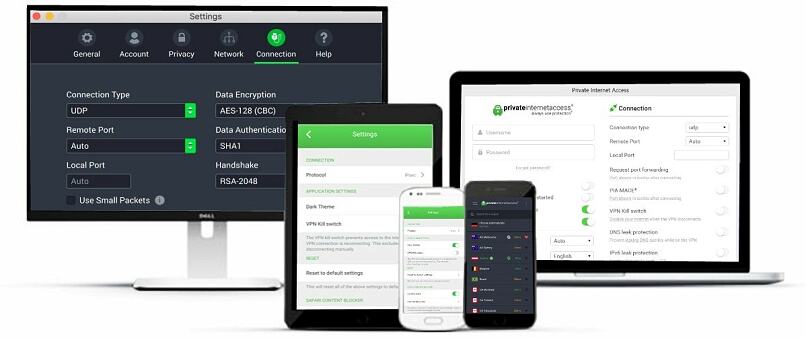
PIA has multiple security customization levels, so you can optimize it for playing Meta Quest games like Vegas Infinite, Tetris Effect, or Resident Evil. You can use 256-bit encryption — which provides advanced protection if you're extra conscious about security — or 128-bit encryption, which is faster for gaming. Features like leak protection also help to safeguard your identifiable details. I tested PIA for leaks several times, but my information wasn't exposed.
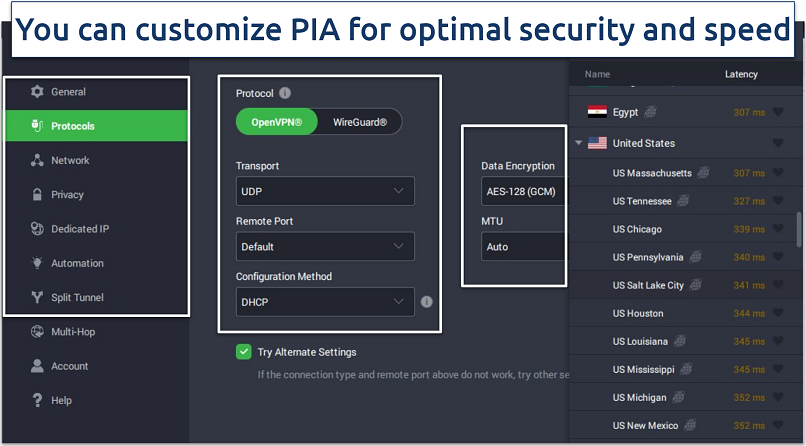 Only the OpenVPN protocol allows you to use different encryption levels
The vast fleet of 29,650 servers worldwide (including in all the US states) offers you secure connection choices for Meta Quest. This broad server distribution also helps to minimize the congestion you get on VPNs with small networks. Most of the servers I tested clocked 100Mbps, representing a 15% drop from my baseline connection without a VPN. Like CyberGhost, there are dedicated streaming servers that work with lots of platforms too.
Due to the many settings, PIA’s apps can be overwhelming if you’ve never used a VPN before. That said, the default settings are optimized for speed, which is ideal for playing games like Sniper Elite or Pavlov Shack. So you can sideload PIA on Meta Quest and start using it right away without tweaking anything. The VPN also supports firmware for several routers including AsusWRT and DD-WRT.
PIA’s plans are affordable, starting at $2.19/month. The VPN is also supported by a 30-day money-back guarantee.
Useful Features
- Unlimited devices. You can connect as many devices to PIA as you want. So you can cover your Meta Quest, laptop, desktop, smartphone, and more — all at the same time.
- PIA MACE. This built-in tool blocks ads, trackers, and malicious websites, increasing safety while surfing on Meta Quest. It operates at the DNS level, blocking unwanted ads or web scripts from loading.
- Port forwarding. This feature facilitates device-to-device communications. It allows for improved matchmaking on many Meta Quest online games.
How to Troubleshoot a VPN Not Working on Meta Quest
While getting a quality VPN to work with the Meta Quest is relatively straightforward with my guide, it’s still possible that you may run into issues. Here’s what you should do to troubleshoot VPN problems on your Meta Quest device:
- Check the VPN setup. Since using a VPN with Meta Quest requires a lot of manual setup, it’s a good idea to go through the process again to make sure you haven’t missed anything. Check your PC configurations or re-download APKs on SideQuest to eliminate any installation issues.
- Check your internet connection. Confirm if your internet connection is working without the VPN. If you can't access the internet even when not connected to the VPN, the issue might lie with your internet service. Try resetting your modem or router to see if it resolves the problem. WiFi extenders can help with weak signals, while using an ethernet cable can help if you’re sharing a VPN connection from a laptop or desktop.
- Try another server. VPN servers can sometimes go down, be taken offline for maintenance, or get congested with other users. Try connecting to another server to see if it helps to fix the issue. Look for servers that are geographically closer to you, as they tend to offer better speeds and reliability as well.
- Update outdated VPN software. Outdated VPN software can lead to compatibility problems or connection failures. Check and update your VPN and sideloaded apps. It’s a good idea to do this regularly to make sure you have the most recent security updates for any apps you use with Meta Quest.
- Check for VPN restrictions. Some sites and ISPs may restrict, block, or throttle VPN traffic, causing connectivity problems. Read your service’s policy on VPN usage and switch to an alternative if restrictions are in place. Or, you can use a VPN with obfuscation technology, which masks VPN traffic as regular traffic (so your ISP or websites can’t tell that you’re using a VPN).
- Check for firewall or security software conflicts. Firewalls or security programs (like antiviruses) on your network or PC can interfere with VPN connectivity. Temporarily turning these off can pinpoint where the cause of your VPN issues lies. If you find that security software is causing problems, modify your firewall settings and set exceptions for your VPN.
- Consider reinstalling the VPN. If the VPN application is malfunctioning, reinstalling it could be a solution. Uninstall the VPN and any residual files (clear the VPN cache), then reinstall it. This can fix any software glitches that might have caused the VPN to malfunction.
- Get assistance from the support team. If all else fails, contact your VPN service and see if they can offer workable solutions to help you connect your Meta Quest headset.
FAQs on How to Install a VPN on Meta Quest
Is it illegal to use a VPN on Meta Quest?
VPNs are legal in most countries. So using a VPN with Meta Quest is fine for enhancing privacy and security while browsing or gaming with your headset. It also helps minimize ISP throttling issues that might slow down your connections.
That said, it’s essential to check the rules in your country to avoid breaking the law. A few countries like China, Russia, and the UAE have restricted or banned VPN use. Some countries, such as Syria, block all Meta services as well.
A VPN can also theoretically get you an IP address from a different country to watch streaming content that’s unavailable in your region. However, this isn’t recommended as it can go against the terms and conditions of many streaming services — including Netflix, Hulu, Amazon Prime Video, Max, DAZN, 10Play, and YouTube TV — or even constitute copyright infringement.
Is there a VPN extension for Meta Quest?
There isn't a direct VPN extension or app available for Meta Quest yet. However, there are plenty of alternative options for using a VPN with Meta Quest, including sideloading a VPN with software like SideQuest. It’s also possible to set up and share VPN connections through your router or via a virtual hotspot from your PC.
Will using a VPN slow down Meta Quest?
A VPN can slow down your internet connection due to the encryption process and additional server hop. That said, the best VPNs are so fast that these speed reductions aren’t noticeable — allowing you to play or stream on Meta Quest without slowdowns. If you’re getting slower speeds than expected, try switching to a server that’s closer to your real location. This can give you better speeds as your traffic has a shorter distance to travel.
Can I use Meta Quest with a free VPN?
It's not recommended. Free VPNs often have limitations such as fewer servers, slower speeds, and data caps, which don’t suit the high-bandwidth needs of VR gaming and streaming. It’s more reliable to choose a reputable paid VPN service with a money-back guarantee to support the fast-paced and intensive VR browsing experience.
Most free VPNs lack robust security and privacy features as well. Worse, they might install malware or trackers on your device or even steal and sell your data to third parties like marketing companies.
Install a Meta Quest VPN in Minutes
Installing a VPN on your Meta (formerly Oculus) Quest can significantly enhance your virtual reality experience. It helps safeguard your online activities, access a wide range of services, and prevent ISP throttling or DDoS attacks that can slow you down.
ExpressVPN is my recommended service for Meta Quest. It delivered the fastest server connections during my tests, supporting high-quality virtual gaming and streaming without interruptions. You can try ExpressVPN risk-free since it’s supported by a 30-day money-back guarantee.
Your online activity may be visible to the sites you visit
Your IP Address:
216.73.216.112
Your Location:
US, Ohio, Columbus
Your Internet Provider:
Some sites might use these details for advertising, analytics, or tracking your online preferences.
To protect your data from the websites you visit, one of the most effective steps is to hide your IP address, which can reveal your location, identity, and browsing habits. Using a virtual private network (VPN) masks your real IP by routing your internet traffic through a secure server, making it appear as though you're browsing from a different location. A VPN also encrypts your connection, keeping your data safe from surveillance and unauthorized access.



Please, comment on how to improve this article. Your feedback matters!