
How to Set Up OpenVPN on Any Computer or Phone in 2025

OpenVPN is widely regarded as the most secure VPN protocol, and for that reason, most premium VPNs use OpenVPN by default.
However, while native apps from providers will securely connect you to their server networks via OpenVPN automatically, there are reasons why you might want to set up your OpenVPN connection yourself.
You might be running an older operating system that does not support the native apps, for example, but still want to securely access the robust server network offered by a premium VPN provider.
Or you might just want the satisfying feeling of taking control of your own internet security and anonymity.
Whatever your reason for manually configuring OpenVPN on your mobile device or computer, we’ve got you covered with detailed setup guides below.
We should offer a disclaimer, however: While manually setting up your VPN connection can offer a great deal of geeky fun – and might be necessary if your operating system isn’t supported – premium VPN services strongly recommend using their native OpenVPN apps for the best security and privacy protection.
Advantages of the OpenVPN Protocol
The term “VPN protocol” refers to the combination of encryption and transmission methods that VPN providers use to make sure you can safely and anonymously connect to their servers.
OpenVPN remains the industry standard for VPN connections. It provides a robust and reliable combination of speed and security.
And because OpenVPN is open-source software, it becomes stronger and more secure over time as developers continuously inspect and strengthen the code. OpenVPN was released in 2001 and has been repeatedly tested and improved ever since.
It supports the strongest encryption algorithms and cyphers, including military-grade 256-bit with AES, and offers an industrial-strength security infrastructure designed to withstand and protect against both passive and active attacks.
In time, another protocol will surpass OpenVPN; that’s the nature of technology. Recently, the release of open-source versions of IKEv2 gave a big boost to that protocol’s status. For now, however, OpenVPN remains the first protocol we look for and the last one we would give up.
How to Set Up OpenVPN on Your Device – Installation Guides
To set up OpenVPN manually, you will need to download a client that allows you to connect to a network via the OpenVPN protocol. We’ll explain which third-party app you need for your device below.
Windows OpenVPN Setup Guide
- Download and install the OpenVPN GUI application.
 Download the OpenVPN app and install it on your computer
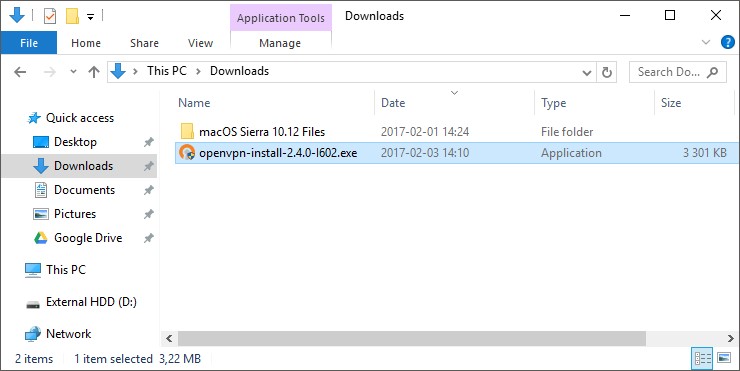
 - Once you have installed the program, download your VPN server configuration files from the provider’s website.
- After downloading the files, navigate to the folder where they’ve been saved and copy them to this directory: C:/Program Files/OpenVPN/config/
- The OpenVPN GUI application supports up to 50 configuration files at once, and each file corresponds to a particular server.
- Now open the OpenVPN GUI app.
- Click Yes to allow the app to make changes to your device.
- The application will start running automatically. Find its icon in your visible or hidden system tray.
- Right-click on the OpenVPN GUI icon and choose a server by clicking Connect.
- Enter your VPN login details in the popup window.
- The app icon will turn green to indicate that you are safely connected to your VPN server via OpenVPN. You are ready for secure, anonymous browsing!
Mac OS X OpenVPN Setup Guide
For Mac users, there are two options to manually install OpenVPN - the TunnelBlick client or the Viscosity client. However, in this scenario, we will be using Viscosity.
- Download Viscosity (supported by OS X 10.7 or newer), then navigate to your VPN website and download the Mac OS configuration files package.
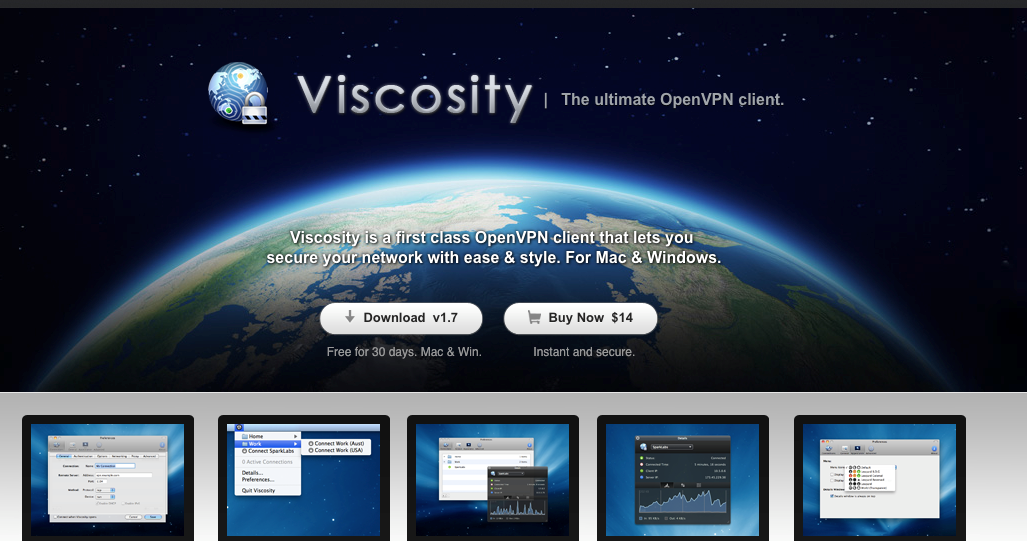 Access Viscosity and download the macOS client
 - Unzip the configurations file package. Then open the Viscosity.dmg file and install the application normally.
- Launch Viscosity from your applications folder, and Allow the Viscosity Helper Tool installation.
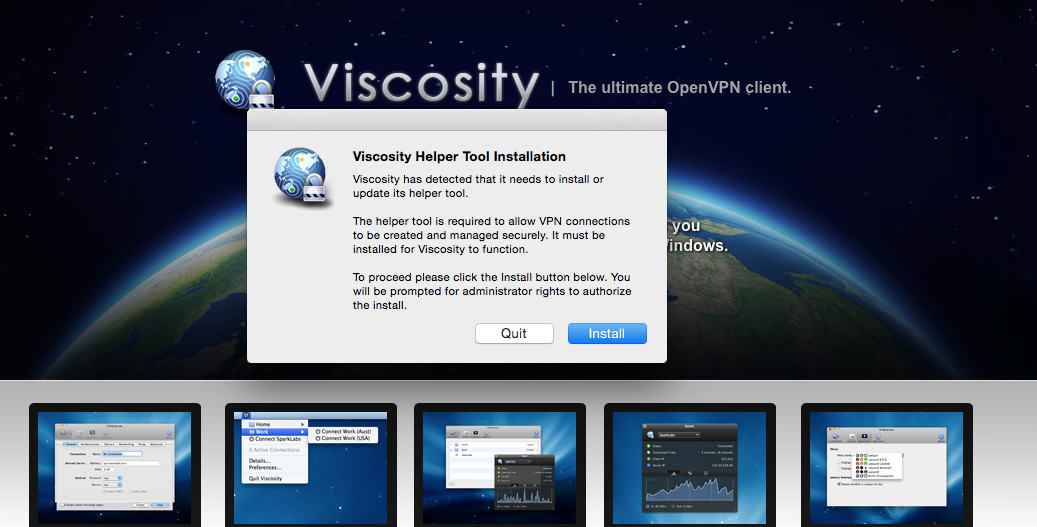 Allow Viscosity to run and install it on your computer
 - Click on the Viscosity icon in your menu bar and then Preferences.
- Click the plus sign in the preferences window, then select Import Connection and From File…
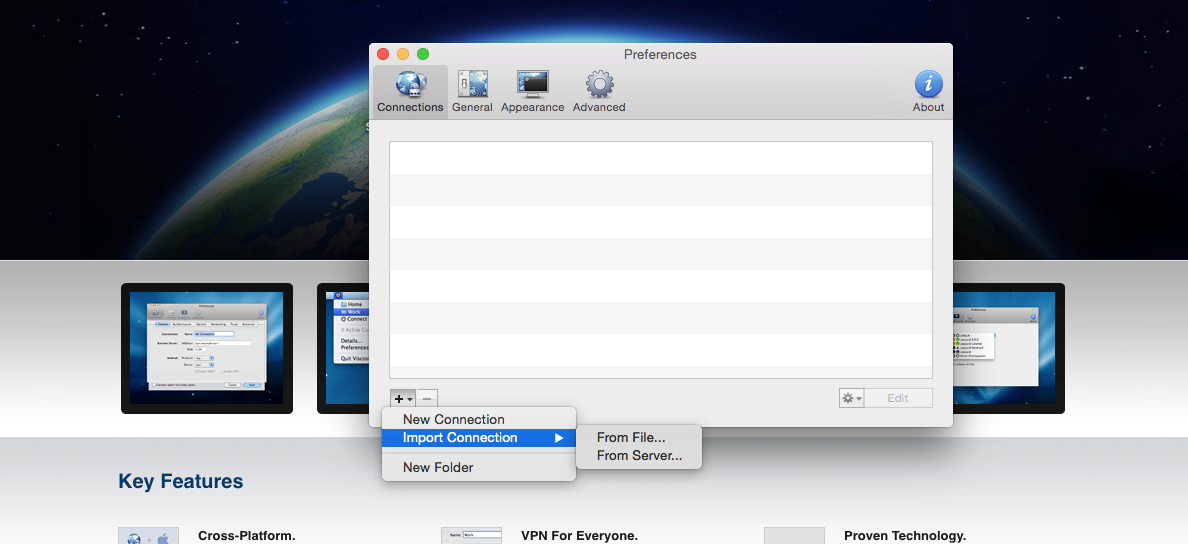 Load the configuration you downloaded into Viscosity
 - Select the configurations folder you unzipped in Step 2.
- After the files have been imported, go to the Viscosity icon in your menu bar. Pick your server from the drop-down list.
- You have successfully set up OpenVPN on your Mac and are ready to surf!
Linux OpenVPN Setup Guide
For connecting to OpenVPN on a Linux system, options include Ubuntu, Debian, and Fedora. In this example, we will demonstrate the process using Ubuntu and ExpressVPN.
-
- Log in to the your VPN setup page with your credentials
- When logged in, you’ll see a list of OpenVPN configuration files on the right.
- Click the location(s) you want in order to download the.ovpn file(s).
- Launch Terminal
- Enter the following text to install OpenVPN
$ sudo apt install openvpn openvpn-systemd-resolved - Enter your VPN password and then enter Y to continue.
- Enter the following to launch OpenVPN:
$ sudo openvpn --config /[path to file]/my_expressvpn_[server location].ovpn --script-security 2 --up /etc/openvpn/update-systemd-resolved --down /etc/openvpn/update-systemd-resolved --dhcp-option 'DOMAIN-ROUTE.' --down-pre - Replace [path to file] with the location you downloaded your VPN configuration file and [server location] with the location in the.ovpn file name.
- Enter your VPN account credentials (the same ones you used in step 1).
- You have successfully connected to your VPN’s OpenVPN network like a software-developing boss!
Android OpenVPN Setup Guide
- Open your browser and download your VPN configuration package from the provider’s website.
- Go to the Google Play store.
 Find and access the Play Store on your Android device
 - Find, download, and install the OpenVPN Connect app.
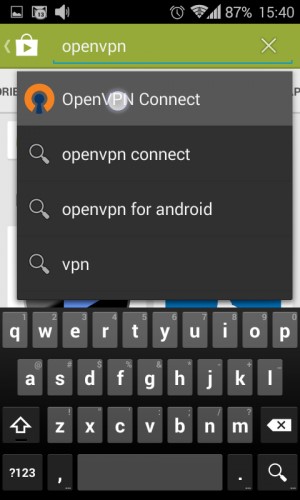 Download the OpenVPN Connect app
 - Accept the terms and open the application.
- In the application, tap the menu button, then tap Import in the drop-down menu.
- Select Import Profile from SD card. Find the configuration files in your Downloads folder.
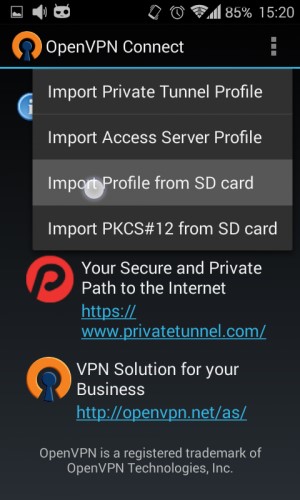 Import the configuration into the OpenVPN Connect app
 - Choose one of the configuration files and tap it to import it.
- Click Accept when prompted.
- Repeat steps 5 through 8 to add other servers to the app.
- Tap the box to get the drop-down menu, then select your server.
- Enter your VPN username and password.
- Tap Connect, and then Continue to connect without a certificate.
- You are now running the OpenVPN protocol for your VPN on your Android phone!
iOS OpenVPN Setup Guide
- Go to the App store on your iPad/iPhone. Find OpenVPN Connect and install the app.
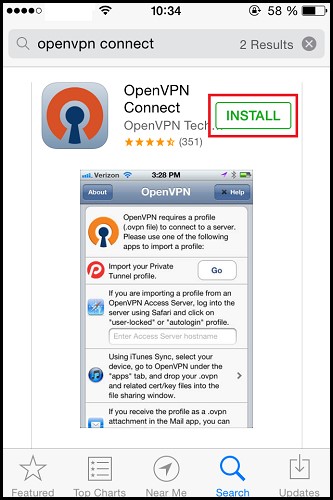 Find the OpenVPN app in your device's AppStore and install it
 - Download one or more of the OpenVPN configuration files from your VPN’s website.
- After downloading the file(s), choose Open in OpenVPN.
- Tap on the green ‘plus’ button.
- Enter your VPN login details and save the password in your keychain. If you are asked for permission to add OpenVPN to your VPN configurations, click Allow.
- Tap on the button to toggle from Disconnected to Connected to connect to your VPN.
- You have successfully connected to your VPN network via OpenVPN on your iOS device! To disconnect, toggle the Disconnected/Connected button back to Disconnected. You can then choose a different server and reconnect if you wish.
Manual OpenVPN Installation with Other VPNs
If you're in search of additional reliable VPN options for your computer or phone, please refer to our list of top providers below. Each of them offers applications with OpenVPN as the default protocol, and they also support manual OpenVPN setup.
Premium VPNs are supported on vast a range of devices, including not only computers and phones but also routers, the Amazon Fire TV Stick, and many more. You can find detailed setup guides for every device on your VPN provider’s website and in our blog archives.
Summary
The OpenVPN protocol remains the industry standard for its combination of speed, encryption strength, and code security. The best VPN providers offer apps that use OpenVPN by default or through an easy Settings change within the apps.
However, there are still circumstances in which you might want to set up the protocol manually. Whether you have an older device or are just interested in how the process works, now you know how to bypass the native apps and connect to OpenVPN in a few simple steps!
If you want to learn more about the differences between various VPN protocols, check out our comprehensive guide to the most secure (and least secure) VPN tunneling methods.
For a great VPN with OpenVPN built right into the apps, try any of these highly recommended providers. Follow the links to get an insider’s deal!
About the Author
Kristina Perunicic is a former editor for vpnMentor. She’s a cybersecurity expert with an interest in VPNs and their importance in the digital privacy landscape.


Please, comment on how to improve this article. Your feedback matters!